Showing posts with label Grade C recipes. Show all posts

Tuesday, December 28, 2010

Day 359: Basil Garlic Bread

I'm trying to get caught up so I can finish the year with 365 recipes.  I got behind when I took a week off to be with my mom.  This bread is actually one I cooked that week, but never posted.  Thank goodness I transferred all my pics to my computer before my camera broke.  It comes from a Taste of Home magazine.

Basil Garlic Bread
10" dutch oven

2/3 cup warm milk
1/4 cup warm water
1/4 cup warm sour cream
1 1/2 tsp. sugar
1 Tbs. butter, softened
1 Tbs. grated Parmesan cheese
1 tsp. salt
1/2 tsp. minced garlic
1/2 tsp. dried basil
1/2 tsp. garlic powder
3 cups flour
2 1/4 tsp. active dry yeast

Dissolve the yeast in 1/4 cup warm water and allow to sit for about 10 minutes.  In a mixing bowl, combine the remaining ingredients except the flour and mix well.  Add the yeast mixture and mix well.  Mix in 1 1/2 cups flour.  Then add enough flour to form a soft dough.  Cover and allow to rise until doubled.  Punch dough down, shape into a ball and place in a greased dutch oven.  Cover and allow to rise until doubled, about 30-45 minutes.  Bake at 350° for 20-25 minutes or until golden brown.  Use 1 1/2 rings on top and 1 ring on the bottom.  Serves 8-10.

The Finished Product


The Review

I was a little disappointed in this bread.  It had great texture and was really soft, but the flavor seemed off.  It was missing something and didn't taste quite right.  When I compare it to some of the other breads I've made this year, it falls a little flat.  I have to give this one a C.

Wednesday, December 1, 2010

Day 334: Chipotle Chicken Alfredo

Just a quick post today!  I have a few extra little people at my house for the day. 

Chipotle Chicken Alfredo
12" dutch oven

3 tablespoons butter, divided
1 pound boneless skinless chicken tenders, cut into 1-inch pieces
Salt and pepper to taste
4 ounces cream cheese, cubed
1/3 cup grated Parmesan cheese
1/2 cup milk
1/2 tablespoon chipotle in adobo puree
8 ounces linguine or fettuccine, cooked and drained

Melt 1 tablespoon of the butter in a dutch oven over a full spread of coals. Season chicken with salt and pepper to taste and cook and stir until chicken is no longer pink. Remove chicken; cover to keep warm.

In the same dutch oven, stir together cream cheese, Parmesan cheese, milk, remaining 2 tablespoons butter and the chipotle puree; cook 5 minutes or until cream cheese is completely melted and mixture is well blended, stirring constantly with wire whisk. Gently stir in chicken. Toss with the hot pasta.

The Finished Product

I forgot to take a picture of this, but you really aren't missing anything.

The Review

I wasn't really impressed with this one.  I did a chipotle chicken pasta a while back that was much better.  The cream cheese in this just overpowered all the other flavors, even the chipotle peppers. I tried to add some chicken broth to thin the sauce (because it was thick and pasty) and dilute the cream cheese flavor, but nothing worked.  I won't make this again.  Grade C-.

Monday, November 22, 2010

Day 325: Creamy Hashbrowns

Last nights dinner was cooked in a terrible snow storm.  I forgot how much I hate being cold!  :)  I totally live in the wrong state if I don't like winter.  Thanksgiving morning is supposed to be 6°.  That's just wrong!  Since it was so cold, I made something that didn't require me to spend too much time outside.

Creamy Hash Browns
12" dutch oven

1 (28 oz.) pkg. frozen O'Brien hash browns, thawed
1 cup shredded cheddar cheese
1 (4 oz.) can chopped green chilies
1 (10 oz.) can cream of chicken soup
1 cup sour cream

In a large bowl, combine all the ingredients.  Pour into a greased dutch oven.  Bake at 350° for 30-35 minutes or until hot and bubbly.  Serves 8.

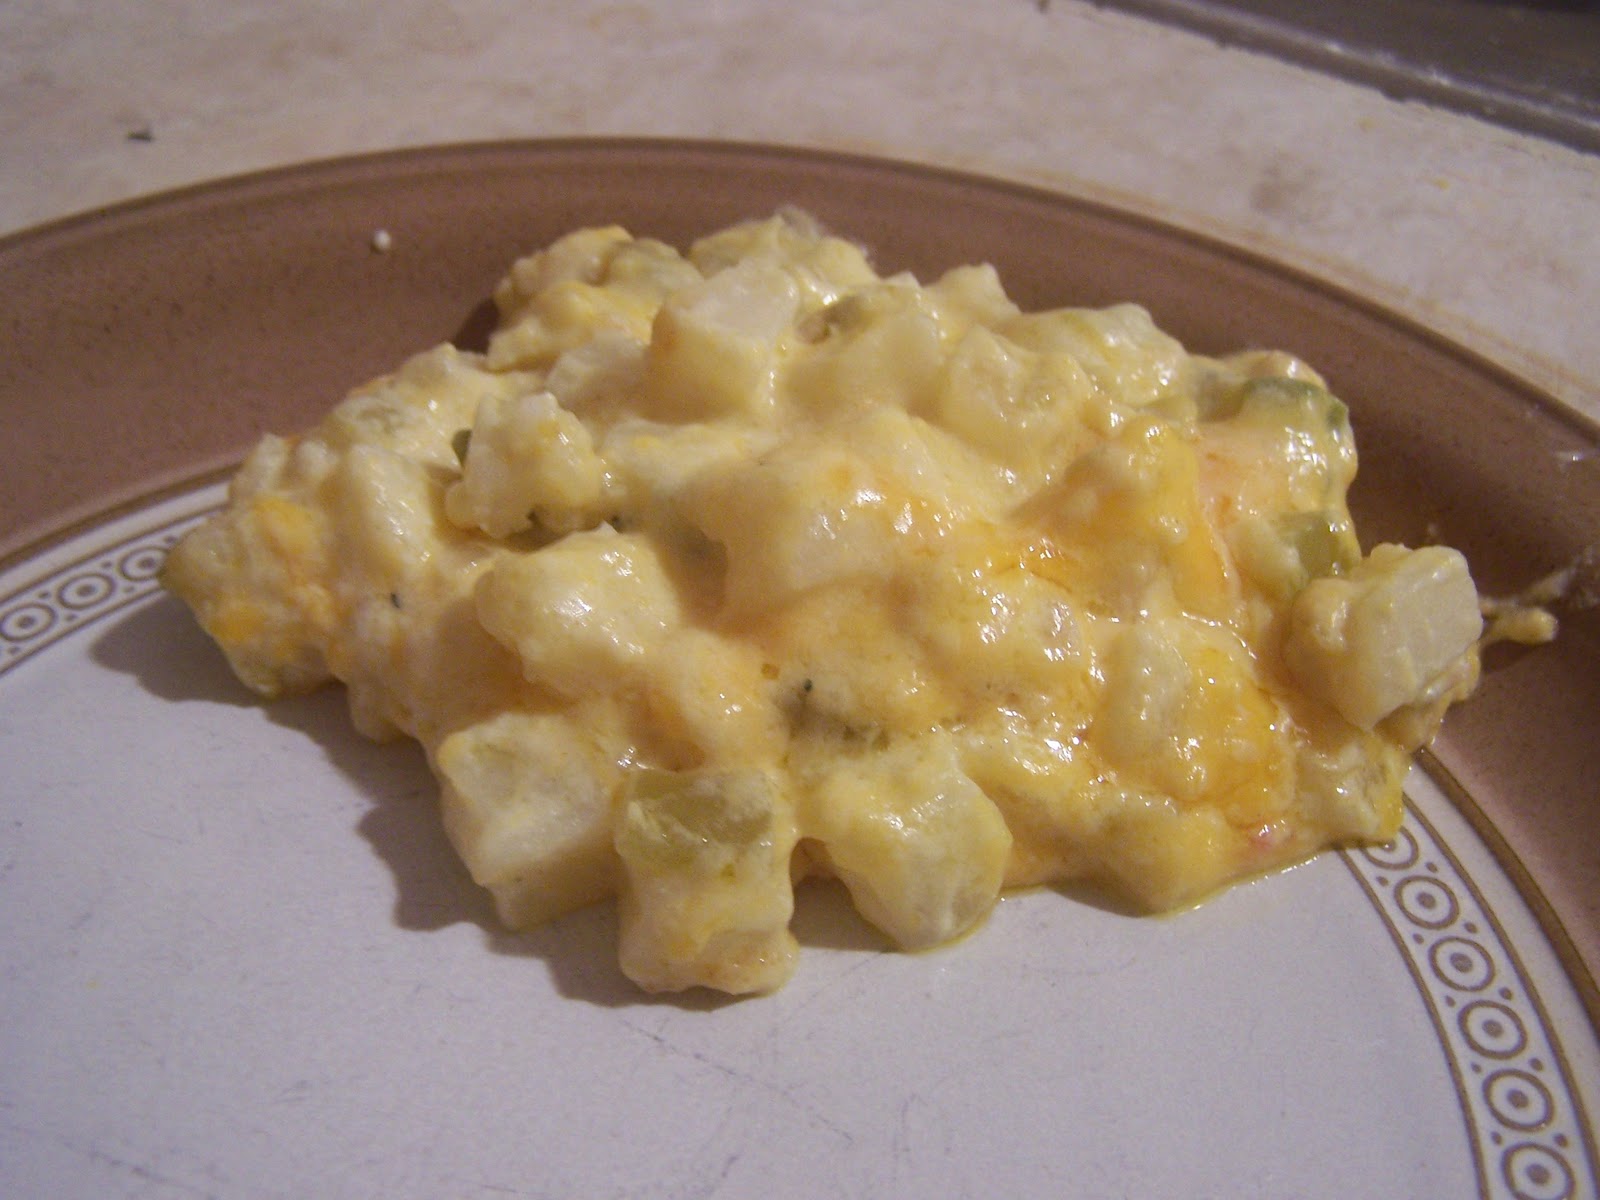
The Finished Product


The Review

This wasn't my favorite dish ever.  I didn't expect it to be great, just better than it was.  Its one of those recipes that tastes great in the mountains when your camping, but not so yummy at home.  I probably won't make these again unless we're camping.  Grade C.

Tuesday, November 2, 2010

Day 305: Vegetable Lasagna

After yesterday's post about the cookbook, I got a few emails about what will be included in it.  So I'm guessing that many of you are having the same questions.  It will include all the "A" and "B" recipes (there will be over 200 recipes), plus everything I've learned about seasoning, cleaning, heat control, baking and so on.  I hope it will be a good resource for the beginner and the experienced dutch oven cook.  All the instructions will also include baking temperatures so you can use it in your kitchen as well.

Vegetable Lasagna
12" dutch oven

2 medium carrots, julienned or thinly sliced
1 yellow summer squash, cut into 1/4" slices
1 medium onion, sliced
1 cup broccoli florets
1/2 cup chopped sweet red pepper
1 medium zucchini, cut into 1/4" slices
1/2 cup sliced celery
1/2 cup chopped green pepper
2 cloves minced garlic
1 tsp. salt
2 Tbs. vegetable oil
1 (29 oz.) jar spaghetti sauce
8-10 lasagna noodles
2-3 cups shredded mozzarella

In a 12" dutch oven over a full spread of coals, stir fry the vegetables, garlic and salt in oil until crisp-tender.  Remove from the pot and keep warm.  Wipe the pot clean with paper towels.   Spread 3/4 cup of sauce into the bottom of the pot. Arrange half of the noodles over the sauce. Layer with half of the vegetables, spaghetti sauce and cheese. Repeat layers. Cover and bake at 350° for 60-65 minutes or until bubbly. Use 1 1/2 ring on top and 1 ring on the bottom.  Let stand 15 minutes before cutting.  Serves 10-12.

The Finished Product


The Review

For a meatless meal this was good.  Its no secret that we're carnivores at our house, so having a meatless meal is a little hard.  But this was yummy and very filling.  My kids only complained a little (which is a big deal).  If I were going to add meat I'd use shredded chicken, but really, this doesn't need it.  I'll make this again when I can get the veggies out of my garden.  Grade B+.

Wednesday, September 29, 2010

Day 271: Turkey Lattice Pie

Yesterday was our last night of soccer--thank heaven!  I love watching my kids play, but it makes my evenings very hectic!  It will be nice to be back on a normal schedule.  So last night I had to make something that was really fast and easy.  And even with something simple we still didn't eat until after 7 pm.  My poor kids were starving!

Turkey Lattice Pie
14" dutch oven

3 tubes refrigerated crescent rolls
4 cups cubed cooked turkey or chicken
1 1/2 cups shredded cheddar or Swiss cheese
1 (10 oz.) pkg. frozen chopped broccoli, thawed and drained
1 can cream of chicken soup
1 1/3 cups milk
2 Tbs. Dijon mustard
1/4 cup chopped onion
1/2 tsp. salt
Dash pepper
1 egg, lightly beaten

Unroll two tubed of crescent roll dough; separated into rectangles.  Press them into the bottom and 1/4 inch up the sides of a dutch oven to form a crust, sealing seams and perforations.  Bake at 350° for 7-10 minutes.  In a bowl, combine the turkey, cheese, broccoli, soup, milk, mustard, onion, salt and pepper; mix well.  Spoon over the crust.  Unroll remaining dough; divide into rectangles and seal perforations.  Cut each rectangle into 5 strips.  Using the strips, make a lattice design on top to the turkey mixture.  Brush with egg.  Bake 20-25 minutes longer or until top crust is golden brown and filling is hot.  Serves 12-16.

The Finished Product


I forgot to brush mine with egg, so it didn't brown as well as it should have.

The Review

This recipe is just okay.  The gravy was really thin, almost soupy.  I would cut the milk down to 3/4-1 cup.  I also wasn't super thrilled with the crescent roll dough.  The flavor of it kind of overpowered everything else.  I would have liked it better with a pie crust.  It also needed some spices, maybe a little thyme.  That being said, it was still good.  It was very easy to make and since I already had some cooked chicken it only took a few minutes to put together.  But since I probably won't make this again, I'm giving this one a C.

Monday, September 20, 2010

Day 262: Amazing Butternut Squash

I need some input from everyone on whether you would be interested in a cookbook that would have all the best recipes from this year.  I've started sorting through the best recipes and organizing them, but I want to see how much interest there is before I really get started on the project.  And if you are interested, would you like to have it before Christmas so you could give it as gifts?  The down side to that is that none of the December recipes would be included in the book.  The other option is to include the December recipes and have the book available in January.  Leave a comment and let me know what you think.  On to the recipe.

I have quite a few butternut squash in my garden, so I've been trying to find new ways to use them.  I did an Internet search and I found a ton of recipes, so I chose the ones that got the best reviews.  I found this one at allrecipes.com. 

Amazing Butternut Squash
10" dutch oven

1 butternut squash, peeled, seeded and cubed
1/4 cup mayo or plain yogurt
1/2 cup finely chopped onion
1 clove minced garlic
1 egg, lightly beaten
1 tsp. brown sugar
salt and pepper to taste
1/2 cup bread crumbs  (I used Panko)
1/4 cup shredded Parmesan cheese
12 Tbs. butter, melted

In your dutch oven over a full spread of coals, boil the squash until it is very tender.  Remove from heat and drain squash.  In the pot, mash the squash.  Add the mayo, onion, egg, brown sugar, salt and pepper.  Mix well and spread in the bottom of the pot.  In a medium bowl, mix together the crackers, Parmesan and butter.  Sprinkle over the squash.  Bake at 350° for 35-45 minutes or until the topping is lightly browned.  Serves 6. 

The Finished Product


The Review

I wouldn't go so far as to call this squash amazing.  I wasn't really impressed.  I mean it was good, but it wasn't anything special.  I have enough recipes for squash that I like better that I probably won't make this again.  Grade C.

Friday, August 27, 2010

Day 238: Camping Chicken Pot Pie

Whew!  I'm glad that today is over.  I hate having car problems.  I wish we could go back to the horse and buggy days, then when my horse gave me problems I could just shoot it.

I have a friend that is going camping for Labor Day weekend and wanted some help practicing DO cooking so she didn't mess up.  So we made this easy pot pie. 

Camping Chicken Pot Pie
10" dutch oven

2 cups chopped cooked chicken breast
1/2 cup thinly sliced carrots
1 - med/large potato diced and cooked
1/2 cup frozen green peas
1 (10 3/4-ounce) can cream of chicken soup
1 cup chicken broth
1 tsp. thyme
1 tsp. rosemary
Salt and Pepper to taste
1 1/2 Cups Biscuit Baking Mix (Bisquick or Jiffy)
1 cup milk
1/2 - Stick Melted Butter

Preheat oven to 350 degrees. In your dutch oven, layer the chicken, carrots, and peas. Mix the soup, chicken broth, thyme, rosemary and season with salt and pepper, if desired. Pour over the layers. Stir together the biscuit mix and milk, and pour this over the casserole. It will be very thin.  Drizzle butter over the topping. Bake until the topping is golden brown, 30 to 40 minutes.

The Finished Product


Sorry, we forgot to take a pic of the inside of this one!

The Review

For a camping meal, we agreed it was pretty good.  For a make at home for dinner meal, not so much.  I think I lower my standards when I cook at camp because everything just tastes better outdoors.  So in my opinion, take this one camping.  The only way I'd make it at home is if I had absolutely nothing else to make.  For camping, we give this a B, for at home it gets a C.

Tuesday, August 24, 2010

Day 235: Roasted Cauliflower

If  have to eat one more stinking casserole I think I'm going to barf!  I may go on a hunger strike too.  We've been so spoiled by what we've been eating.  Normally I can make it through the lean times without to much complaint, but right now, I've about had it with the food.  I'm actually enjoying making a menu and looking forward to going grocery shopping.  I must have a fever!  Can you tell I'm kind of on a food downer?  We're used to eating a variety of meals, so when we are stuck with one type of meal (read casseroles) for very long it gets boring and semi disgusting.  Thank goodness I get to go shopping in 2 more days!  But enough of my griping!

I  made this cauliflower to go with yet another (gross) casserole last night.  I won't subject you to the casserole, but you do get the cauliflower.  I found this in a stack of handwritten recipes I've had laying around.

Roasted Cauliflower
14" dutch oven

5-6 cups cauliflower florets, cut into bite sized pieces (I used two 1 lb. bags of frozen cauliflower)
1/4 cup olive oil
1 Tbs. sliced garlic
2 tsp. fresh lemon juice
1 tsp. kosher salt
1/2 tsp. black pepper
2 Tbs. freshly grated Parmesan cheese

In a large bowl, mix the olive oil, lemon juice, salt and pepper.  Add the cauliflower and stir well.  Pour into a 14" dutch oven and spread out into a single layer.  Bake at 500° for 10-15 minutes, stirring occasionally.  Use 3 rings on top and 1 ring on the bottom.  Serve with fresh Parmesan cheese.  Serves 6-8.

The Finished Product


The Review

This was just okay.  I could be good if it had more flavor.  There was a TON of garlic, and I never thought I'd say this, but it was to much.  If I make this again, I'll use less garlic, more salt and add some spices to give it more flavor.  We gave this a C.

Monday, August 16, 2010

Day 227: Easy Dutch Oven Roast

I have a confession to make.  In the last 15 years I haven't cooked a roast anywhere but the crock pot.  I've been totally spoiled by roasts that are so tender you can't get them out of the slow cooker in one piece.  I was a little apprehensive about how a dutch oven roast would turn out.  Not that it wouldn't be good, just that it wouldn't be very tender.  I thought I'd try a recipe that a friend gave me a while back.  This roast makes its own gravy.  I also figured the soups in this one would keep it nice and moist.

Easy Dutch Oven Roast
10" dutch oven

2 lb. roast  (use a good cut of beef.  I used a sirloin tip roast)
1 can cream of mushroom soup
1 can cream of celery soup
1 envelope brown gravy mix
salt and pepper

Place the roast in the dutch oven and lightly salt and pepper it.  Combine the remaining ingredients and pour over the roast.  Bake at 350° for 2 hours or until the roast is tender and cooked through.  Serve with mashed potatoes or bake with potatoes and carrots.

The Finished Product


The Review

This roast was good.  It was tender and juicy and the gravy was yummy.  I used a 4 lb. roast and cut it in half to help it cook faster.  I cooked mine for 3 1/2 hours and added carrots and potatoes during the last 1 1/2 hours of cooking.  Like I said, it was good but it didn't "wow" me.  It was just your average roast.  I must admit that I have finally found something that I would rather cook somewhere other than the dutch oven.  I know I could get a roast "fall apart tender" in the dutch oven, but it is just so much easier to do in the crock pot.  I can't believe I'm actually saying this, but I probably won't cook another beef roast in the dutch oven unless the power goes out or something.  I'm giving this a C+ because its not my preferred method to cook a roast.

Wednesday, August 11, 2010

Day 222: German Meatballs with Buttermilk Gravy

Last night's dinner was a cook and run.  I had to have my daughter to a cross country work out at school so I didn't get to see dinner until it was cold.  Its days like those that I'm really glad my oldest son can cook.  I started it and he finished it.  I found this recipe here, and it looked pretty good.  Caramelized onions are always a plus in my book.

German Meatballs with Buttermilk Gravy
14" dutch oven

2 lbs Lean Ground Beef
1 Egg
1/4 cup Milk
1/3 cup FRESH Bread Crumbs
1 Small Onion, diced small
2 tsp Spicy Brown Mustard or Regular Yellow Mustard
1 tsp Salt
1/2 tsp Black Pepper
1 Tbsp Vegetable or Canola Oil
1 Medium Onion, thinly sliced
2 Tbsp Olive Oil
1/4 cup Flour
2 cups Buttermilk
1 tsp Brown sugar
2 Tbsp Butter

Heat 2 tablespoons of olive oil and 1 tablespoon of butter in a 10" dutch oven and melt together over a full spread of coals. Add the 1 teaspoon of light brown sugar to the melted butter/oil, add the sliced onion and cook for 5 minutes stirring occasionally until onions begin to brown. Remove a few coals to lower the heat and continue to cook onion stirring occasionally until softened and caramelized, about 15-20 minutes.

While the onions cook, mix the egg, bread crumbs, milk, salt, pepper, and mustard together in a bowl. In a medium bowl add the ground beef, diced onion and bread crumb mixture together. Mix gently until the onions and bread crumbs are evenly incorporated. Shape into walnut sized meatballs. After the onions are caramelized add 1-2 tablespoons of water to the onions to deglaze the pan and set aside. Put the meatballs in a 14" dutch oven and bake them at 400 for about 30 minutes or until they are no longer pink.

Remove meatballs from the pot and add 2 tablespoons of butter to it, add the flour and cook for 1 minute. Whisk the buttermilk into the flour, continue whisking until the gravy is smooth. Taste gravy and season with salt and pepper if needed. Add the caramelized onions and meatballs back to the skillet and allow to simmer for 2-3 minutes or until the gravy has thickened. Serve over hot spaetzle noodles or rice. Serves 8.
 
I couldn't get a picture of this since I was gone.  Sorry!
 
The Review
 
These were just okay.  The gravy was bland even with the caramelized onions.  Some beef bouillon or even some nutmeg would have helped.  They weren't difficult to make, just a little time consuming.  I most likely won't make these again, especially since I have so many other good recipes for meatballs.  Grade C.

Monday, August 9, 2010

Day 220: Baked Zucchini with Mozzarella

I needed a fast and easy side dish for dinner last night.  I got busy playing board games with my kids and forgot all about dinner so I had to come up with something quick!  I had seen these on Real Mom Kitchen a while ago and thought I'd give them a try. 

Baked Zucchini and Mozzarella
12" dutch oven

3 medium sized  zucchini
Johnny’s Garlic Spread & Seasoning (I found it at Costco)
kosher salt
2 C shredded mozzarella cheese

Slice your zucchini up into 1/2 inch rings.  Lay them out flat on a large cookie sheet. Sprinkle with Johnny’s Garlic Seasoning and a bit of salt.  Bake at 350 for about 10-15 minutes or until crisp tender.  Use 1 1/2 rings of coals on top and 1 ring on the bottom.

Sprinkle the zucchini with cheese. Move all the coals from the bottom of the oven to the top, and continue to cook until the cheese gets all bubbly and a bit browned.  This won't take very long.  Serves 6.

The Finished Product


The Review

We were really disappointed by these.  They had kind of a weird taste.  None of my kids would eat more than 1 or 2.  They weren't gross or anything, they just weren't that good.  Its to bad because they were really fast and easy to prepare.  We decided that these get a C.

Friday, July 16, 2010

Day 196: Pizza Swirls

My kids liked yesterday's hamburger roll ups so much that they wanted to try it with pizza today.  As I was thumbing through a cookbook, I happened across a recipe for them.  This comes from another church cookbook

Pizza Swirls
12" dutch oven

1 1/2 cups flour
2 tsp. baking powder
1/2 tsp garlic powder
1/3 cup shortening
3/4 cup milk
1 lb. ground beef
1/2 cup minced onion
1/2 cup chopped green pepper
1 small can sliced mushrooms, drained
1 tsp. salt
1/2 tsp oregano
1 (15 oz.) can herbed tomato sauce ( I used pizza sauce)
1 cup shredded mozzarella cheese

Mix the flour, baking powder and salt.  Cut in shortening to consistency of cornmeal.  Stir in milk just to moisten dry ingredients.  Turn out on a lightly floured surface and knead lightly 6-8 times.  Roll into a 1/4 inch thick rectangle. 
In your dutch oven over a full spread of coals, cook the ground beef, onion and green pepper until the onion is soft and beef is cooked through.  Drain any grease and stir in the mushrooms, salt, oregano and 1/2 cup herb sauce.  Spread over the biscuit dough.  Sprinkle with cheese.  Roll up starting with the long side.  Cut into 1 1/2 inch slices.  Arrange in your greased DO and bake at 425° for 15-20 minutes.  Use 2 1/2 rings on top and 1 ring on the bottom.  Serve with remaining tomato or pizza sauce.

The Finished Product


The Review

The idea for these is really good, but I've decided that I really don't like pizza toppings and biscuit dough together.  The flavors just don't work for me.  This would be much better made with actual pizza dough and it wouldn't be any harder to do.  One of the problems with this recipe is that the biscuit dough is so soft that it tears easily.  Pizza dough would hold up better and not fall apart as much.  You could also put garlic powder and herbs in the dough to add flavor.  My kids really liked this, and I guess that's what counts since I made it for them.  But next time I'll make the changes and make it even better.  This recipe gets a C-.

Saturday, May 22, 2010

Day 141: Spicy Chicken with Broccoli

Hi everyone!  Sorry for the late post today, I just picked up my mom-in-law from the airport, and I'm finally home.  I'm sure all of you have better things to do on a Saturday anyway.  : )
I got this recipe from a Betty Crocker cookbook.

Spicy Chicken with Broccoli
12" dutch oven

4 boneless, skinless chicken breasts
2 tsp. cornstarch
1/2 tsp salt
1/4 tsp. white pepper
1 lb. broccoli
3 green onions with tops
1 hot green chili or 1 tsp. dried red pepper flakes
3 Tbs. vegetable oil
2 Tbs. brown bean sauce (I couldn't find this so I used soy sauce)
2 tsp. finely chopped garlic
1 tsp. sugar
1 tsp finely chopped ginger root (I used ground ginger)

Cut the chicken in chunks and mix with cornstarch, salt and white pepper.  Refrigerate 20 minutes.
Cut up broccoli into chunks and boil in water for 1 minute; drain.  Immediately rinse in cold water; drain.  Cut green onions diagonally into 1 inch pieces. 
Heat your DO until very hot.  Add 3 Tbs. oil to coat the bottom of the DO.  Add the red pepper flakes, brown bean sauce, garlic, sugar and ginger root; stir fry for 10 seconds.  Add the chicken; stir fry 2 minutes or until chicken is white.  Add the broccoli and green onions; stir fry 1 minute or until broccoli is hot.  Serves 4.

The Finished Product


The Review

This was pretty good.  I used frozen veggies so I didn't have to precook the broccoli, so that made it easier.  I also couldn't find brown beans sauce, and I know that would have made the flavor even better.  I used 1/2 tsp. of hot pepper flakes because of my little kids.  The truth is I could have cooked some chicken, thrown in a bag of stir fry veggies, some stir fry sauce and pepper flakes and it would have been just as good.  Even though we like it, I probably won't make this again just because there are easier ways to do it, and when it comes to stir fry, the easier the better.  Grade C.

Friday, May 21, 2010

Day 140: Skillet Tacos

Last night I used Kingsford charcoal for the first time since about February.  I'd forgotten how tiny the briquettes are.  I've been using Sam's Choice from Walmart, and they are about double the size of Kingsford.  So I did a skillet meal, since I'm always gone Thursday nights.  I used 24 briquettes under my 12" oven.  It could have been that I was impatient and in a hurry, but it seemed to take forever to get the ground beef sizzling. 

Now I know that in theory all briquettes should be about the same, but learning to use a different brand of briquettes is like learning to use a new oven.  The new one may heat up slower, it might have hot spots in different places or the temperatures may be just a little different that the old oven you used forever.  You just have to adapt a little bit and learn how to make the new one cook just right.  Does that make any sense?  : P

Today's recipe came from Real Mom Kitchen, one of my favorite food blogs.  It is a super easy and quick one pot meal.

Taco Skillet
12" dutch oven

1 pound ground beef
1 small red onion, chopped
1 1/2 cup frozen corn
10 corn tortillas (6 inches), cut into 1-inch pieces (I use my pizza cutter to do this)
1 bottle (8 ounces) taco sauce (I used El Pato jalapeno tomato sauce)
1-1/4 cups shredded cheddar cheese, divided

In your DO, cook beef and onion over 20-24 coals until meat is no longer pink; drain.
Rinse frozen corn in a colander with warm water and drain.
Add the drained corn, taco sauce, and 1 cup cheese to meat until well mixed.
Mix in tortilla pieces and heat through.
Sprinkle with remaining cheese. Serves 5-6

The Finished Product


The Review

In all fairness, this was good.  I just isn't a dish that meets my standard for an everyday meal.  We're really not casserole people even though I make them fairly often just because they're quick and easy. However, this would be a great camping meal.  Its made in one pot-quick and easy- just like you want when you're roughing it.  It has good flavor and you could top it with salsa, sour cream or anything you like.  So as an everyday meal, I give this a C, but as a camping meal I have to say B+.

Saturday, May 15, 2010

Day 134: Sweet Strawberry Bread

I was up until midnight making this bread.  It took longer than I thought it would, but that was my fault.  Then this morning, bright and early, I got to go play with the flowers at my friend's commercial greenhouse.  What a great day!  I love plants and growing things about as much as I love my dutch ovens!
Oh!  I keep forgetting to tell you all, I got to do an interview for a dutch oven cooking article that will appear in Airstream Life magazine.  I had a great conversation with Tom, who is a free lance writer.  He also interviewed Jack Wallace who is the director of education for IDOS.  I'm looking forward to reading the article and I'll keep you all posted with the details!  I'm glad I can help get the word out, and maybe help motivate people to try this fun style of cooking.  Thankfully, I don't have to convince any of you!
 I found today's recipe on the Internet, but I can't for the life of me remember where.  If I run across it again, I'll give credit where it is due.

Sweet Strawberry Bread
12" dutch oven

3 cups of flour
2 cups sugar
1 tsp. baking soda
1 tsp. cinnamon
1 tsp. salt
 4 eggs
1 cup oil
2 cups chopped strawberries

Mix the flour, soda, cinnamon and salt in a large bowl.  Add eggs, sugar and oil.  Mix well and carefully add the strawberries.  Pour into a greased dutch oven and bake at 350*  for 1 hour, using 14 coals on top and 10 on the bottom.  Cool 15 minutes before removing from DO. 

The Finished Product


The Review

I'm not sure how to say what I think of this bread.  This was good, but not great.  I've tried several strawberry bread recipes and they have all been less than satisfying.  I really wanted to taste the strawberries, and I just couldn't.  I guess there is no way to cook strawberries and still get the fresh, sweet/tart taste that makes them so good.  I doubled this recipe and cooked it in my 12" oven.  That was a BIG mistake.  After 2 hours of cooking, it was finally cooked through without being burned, and completely filled my oven within 1 inch of the top.  If you are going to double it, use a 14" oven.  The dough also grossed me out.  It was so thick before I put the berries in that it looked like oily play dough.  Once the berries were in it took on the right "banana bread batter" consistency.  I probably shouldn't sound so negative about it, because it was pretty good.  I can just think of many other ways I would rather use strawberries.  Grade C-.

Wednesday, May 12, 2010

Day 130: Country Potato Chowder

Good Morning everyone!  I'm running late this morning (shocking, I know), so just a quick post!
I got this recipe from a Taste of Home magazine.  It has been cold and rainy here and I saw that as an excuse to make soup one more time before summer comes, which should be tomorrow.

Country Potato Chowder
12" dutch oven

6 bacon strips, diced
1 medium onion, chopped
3 celery ribs, chopped
1/4 cup flour
1 quart half and half
4 medium potatoes, peeled and cut into 1/2 cubes
2 cans cream of celery soup
2 Tbs. dried parsley flakes
1 Tbs. Worcestershire sauce
1 tsp. season salt
1/2 tsp. pepper
1 cup sliced carrots
1 cup fresh or frozen green beans, cut into 2" pieces
1 can cream style corn

In your dutch oven, over 18-20 coals, cook the bacon until crisp; remove from pot and drain on paper towels.  Drain all but 2 Tbs. of the grease.  In the drippings, saute the onion and celery until tender.  Sprinkle with flour and stir until blended.  Gradually add the cream.  Stir in the potatoes, soup, parsley, Worcestershire sauce, seasoned salt and pepper.  Bring to a boil; cook and stir for 1 minute.  Reduce heat (I took a few coals off); cover and simmer for 25 minutes, stirring occasionally.  Add the carrots and beans.  Cover and simmer 15 minutes longer or until the vegetables are tender.  Stir in the corn and bacon, heat through.  I added about 10 coals for the last 15 minutes of cooking.  Serves 12.

The Finished Product


The Review

This was pretty good.  It wasn't my favorite soup ever.  It also took a lot longer to cook than the recipe shows.  We were all starving by the time it was ready.  I certainly have better veggie soup recipes and I probably won't make this again.  If I do, it will be one of those "once every couple of years" recipes.  It was kind of a pain since it took so long to cook. I was disappointed.  This soup gets a C-.

Monday, April 19, 2010

Day 109: Herb-Rubbed Chicken with Creamy Orzo

I'm not sure where I got this recipe, just that I found it online, and it looked pretty good. So, I apologize to the author of it, whoever you are! If I can find it again, I'll post a link. I've wanted to try this recipe for a while just because it used orzo. I love that little pasta. It is such a nice change from rice (which we eat all the time). I liked that it wasn't fussy,and came together quickly.

Herb-Rubbed Chicken with Creamy Orzo
12" dutch oven

8 oz. orzo pasta, uncooked
2 chicken breasts, butterflied into halves (or 4 small breasts)
Salt and pepper
2 tsp. herb de Provence
2 Tbs. olive oil
1 shallot, finely chopped
2 cloves garlic, minced
1 (14 oz.) can diced tomatoes with juice
2 cups broccoli florets
1/2 cup heavy cream
1/3 cup freshly grated Parmesan cheese

Bring a pot of salted water to a boil. Add the orzo and cook until al dente, about 10 minutes. Drain pasta, reserving 1/2 cup of pasta water.

Season both sides of chicken with salt and pepper. Sprinkle evenly with Herb de Provence. Heat the olive oil in a 12" dutch oven using about 20 coals. Add the chicken breasts to the pan and cook until golden brown. Reduce the heat (I took about 4 coals off) and add the shallot; saute 2-3 minutes. Add the garlic and saute 1 minute more, or until fragrant. Add the diced tomatoes with juice and broccoli florets, scraping the bottom of the pan to remove any browned bits. Bring to a boil, then reduce heat to simmer over medium low. Cover and let cook until the broccoli is crisp tender, about 10-15 minutes. Stir in the cooked orzo, heavy cream and Parmesan cheese. Mix until well blended, and Parmesan cheese has melted. If necessary, add some of the reserved pasta water to smooth out the sauce. Season to taste with salt and pepper. Serve immediately.

The Finished Product


The Review

I was really disappointed by this dish. All the comments about it on the site it came from were about how wonderful it was. I thought it was pretty bland. Even my kids said it didn't have much flavor, and it has to be really obvious for them to notice. I won't make this recipe again as it's written, but it has potential to be delicious. I'm going to experiment with it a bit and see if I can't add some flavor and make it better. What do all of you think? What would you add? I really want to like this one! If I get it worked out, I'll re-post the new version. Grade C-.

Thursday, March 25, 2010

Day 84: Chicken Tortilla Casserole

I promise this is the last of the "I'm too sick to cook" recipes. I'm finally feeling better so there will be some better recipes ahead. Nothing makes you appreciate good health like being sick.
This would actually be a good camping recipe. If you cooked your chicken ahead of time. it would be a snap to put together. Add some salsa and chips and your done. It is also a great recipe for busy days.

Chicken Tortilla Casserole
12" dutch oven
2-3 cups diced cooked chicken
12-15 corn tortillas
1 can cream of chicken soup
1 can diced green chilies
1 14 oz. can green enchilada sauce
1/2 cup diced onion
1 cup sour cream
4 cups shredded cheddar cheese, divided
Tear tortillas into chunks. Put the torn tortillas and the remaining ingredients, except 2 cups of cheese, in a DO. Mix until the chicken and tortillas are well distributed. Bake at 350* for 40-45 minutes or until hot and bubbly. I used 10 coals on the bottom and 14 on top. Sprinkle with remaining 2 cups of cheese during the last 5 minutes of cooking. Serve with salsa and corn chips. Serves 8-10.
The Finished Product
.
The Review
This was really easy and turned out better than I expected it to. My kids put the whole thing together, bless them. Like I said before, it would be a good camping meal because it is so simple. I like this recipe better than any similar ones I've tried. That being said, it is something I'll probably make once or twice a year. Partly because I love trying new things, so only the best recipes go into our normal rotation, and partly because the hubby doesn't like these kinds of casseroles. I'll give this one a B-.

Monday, March 1, 2010

Day 61: Cheeseburger Soup

I love soup. I love soup so much that I could eat it everyday and probably never get tired of it. My hubby, however, does not like soup. Since the weather is warming up and his days on the night shift are numbered, I really need to get in all the soup I can. Soup seems so much better in the DO. I really should say that everything seems so much better in the DO. I don't know if I will be able to give up that great flavor. I may end up cooking in my DO forever! Here is today's recipe!

Cheeseburger Soup
12" dutch oven

1/2 lb. ground beef
4 Tbs. butter, divided
3/4 cup shredded carrots
3/4 cup chopped onion
3/4 cup diced celery
1 tsp. dried basil
1 tsp. dried parsley flakes
3 cups chicken broth
4 cups diced potatoes
1/4 cup flour
1 1/2 cups milk
8 oz. processed American cheese, cubed
3/4 tsp. salt
1/2 tsp. pepper
In your DO, over about 18 coals, brown the beef, drain and set aside. In the same DO, saute the onion, carrots, celery, basil and parsley in 1 Tbs. butter until the veggies are tender. Add the broth, potatoes and beef; bring to a boil. Remove a few coals, cover and simmer for about 10 minutes or until the potatoes are tender. Meanwhile, in a small DO, melt the remaining butter. Add the flour; cook and stir for 2 minutes. Add to the soup, bring to a boil. Cook and stir for 2 minutes or until thickened. I had some roux in the fridge that I used, so I skipped making it. Remove a few more coals, you want a low heat now. Add the cheese, milk, salt and pepper. Cook and stir until the cheese melts. Makes 8 servings.


The Review
I have to say, this soup was just okay. I really didn't expect to be blown away, but I thought it would be better than it was. About half my kids ate it, the other half tolerated it. I'm glad I didn't double the recipe. This is the kind of recipe I will maybe make once a year, but no more often than that. Maybe I could spice it up with just a little hot pepper sauce. I have to give this recipe a C+.

Tuesday, January 12, 2010

Day 12: Honey Glazed Carrots

Wow! This post is late today--sorry everyone! We finally sold my hubby's snowmobile and we had to lovingly deliver it to it's new home. I hope it is very happy there. It is a good day and a day for mourning. Good in that now we can fix the transmission on his truck and bad in that winter goes by REALLY slow when you don't have something fun to do. But at least we are "over the hump" as far as winter is concerned. In my neck of the woods we have entered the time when the average daytime temperatures finally start going up. Bring on spring! And speaking of spring...today features my favorite spring veggie cooked dutch oven style. This recipe comes from "101 Things to do With a Dutch Oven" by Vernon Winterton.

Honey-Glazed Carrots
10" dutch oven
1/4 cup butter or margarine
1 lb. baby carrots
1/2 cup honey
2 Tbs. brown sugar
Place butter in warm dutch oven and melt. Add carrots to melted butter, then pour the honey over the top and sprinkle with brown sugar. Cover and bake 30 minutes, or until tender, at 325 degrees using 8 coals on the bottom and 10 on top.
The Finished Product

What I learned
This one was really easy. I added a couple of coals to the top because it was so cold outside and mine took about 45 minutes. Other than that, it went off without a hitch!
The Review
Carrots are one of my favorite spring veggies, and there are very few ways that I don't like them. This recipe, however, was not my favorite. It had okay flavor, but it was really missing something and I couldn't quite figure out what. It was easy enough to do, but I probably won't make this one again unless I can figure out what it needs. This recipe gets a C.

print friendly

Related Posts with Thumbnails