Wednesday, June 30, 2010

Day 180: Vegetable Lasagna

It was veggie night again at our house so I had to come up with a meal that was just vegetables.  It is harder than you'd think when you are used to eating meat everyday.  Being vegetarian once a week gives me more respect for people who do it everyday.  I could never do it.  My quest is to find something filling and nutritious  that everyone will eat.  So I came up with vegetable lasagna.

Vegetable Lasagna
12"  dutch oven

8-10 oven ready lasagna noodles
1 jar of your favorite spaghetti sauce
3 medium carrots, shredded
3/4 cup broccoli, finely chopped
2 medium zucchini, sliced
2 medium yellow summer squash, sliced
1 (16 oz.) container cottage cheese
1 egg
1/2 cup Parmesan cheese, grated
dried basil, thyme and oregano to taste
shredded mozzarella cheese

Mix the cottage cheese, egg, Parmesan cheese and spices, set aside.  Put the sauce in your dutch oven over a full spread of coals.  Add the shredded carrot and chopped broccoli and heat through.  Remove all but about 3/4 of a cup of the sauce and set aside.  layer half of the noodles, cottage cheese mixture, squash, sauce and mozzarella cheese in that order.  Repeat layers ending with mozzarella cheese.  Bake at 350° for 45 minutes to 1 hour using 1 1/2 rings on top and 1 ring on the bottom.  Let stand 10 minutes before serving.  10-12 servings.

The Finished Product


The Review

This lasagna was pretty good.  You can use any combination of vegetables you want.  Eggplant would be good.  Honestly, meat lasagna is tons better, so I may only make this vegetarian version once or twice a year--  But I'll add meat to it next time.  Grade B.

Tuesday, June 29, 2010

Day 179: Raspberry Twist Bread

Happy Tuesday everyone!  Tuesday is my favorite day of the week right now since it is my hubby's only day off.  It is the day we ride horses or go fishing or go to the movies.  I think today is the day to head up to a cool mountain lake , get away from the heat and drown worms!  I'm worse than most men I know, I could fish all day, every day.  But enough of that. 

Today I'm posting the bread I made at the cook off on Saturday.  I found this one in an online recipe book from the Lehi Round up back in 2007.  I chose this bread because it is really easy for a yeast bread but it looks complicated.  It was Omar Alvarez and Dian Mayfield's recipe.

Raspberry Twist Bread
12" dutch oven

2 1/2 to 3 cups all purpose flour
2 Tbs. sugar
1 tsp. salt
1 Tbs. active dry yeast
3/4 cup milk
2 Tbs. melted butter
1 lg egg
1 cup raspberry preserves

Topping

1/4 cup all purpose flour
2 Tbs. brown sugar
2 tsp. cinnamon
2 Tbs. butter, softened (not melted)
2 Tbs. milk
1 egg yolk

Combine milk and 2 Tbs. butter in small oven, heat to 115-120 degrees.
In a large bowl combine 1/2 cup flour, sugar, salt. Slowly mix in milk mixture, and beat well
until smooth.  Add egg and 1 cup flour and beat until you get a smooth batter.  Mix in enough of the rest of the flour to make a soft dough, in half cup increments.  On a lightly floured board, knead until smooth - (about 10 minutes)  Put into a lightly oiled bowl, turn to coat. Cover and let rise until doubled in size (about 1 hour).

Punch down dough and divide in half.  Roll out first half to fit the bottom of the 12 in pot.  Place dough into oven and brush with the melted butter.  Place dough into oven and brush with the melted butter.  Coat with raspberry preserves.

Roll out second half of dough to cover first, place over preserves.Press a small condiment cup lightly into center of dough to mark a 2 inch circle.  Remove the cup and slice thru both layers of dough from the mark to the edge of the pot in 16 increments (easier if you cut into quarters and then split quarters).  Twist each section 3-4 times and tuck back down.  Cover and let rise 30 minutes.

Topping:

In a small bowl combine flour, brown sugar and cinnamon. Cut in butter until crumbly.
In another bowl, mix milk and egg yoke, mix with fork
Once bread has risen, brush top with egg mixture and sprinkle with dry topping.
Cook for 30-45 minutes, until top is golden brown. Use 16 coals on top and 10 on the bottom.  If after 30 minutes the top still needs more time, remove the bottom coals to prevent burning.

The Finished Product


The Review

This was really good, despite the problems I had with it.  I forgot to oil the pot so the raspberry preserves made the bread stick to the pan, and when I was making the topping I accidentally dropped my butter in the dirt, so I couldn't mix it into the brown sugar mixture.  Other than that, the bread was soft and delicious.  I'm going to make this again since my kids went crazy for it.  Its a fun breakfast bread.  I'm thinking it would be fun on a holiday morning.  You could even sprinkle some fresh blueberries over the raspberry preserves and put a powdered sugar glaze with a little lemon juice or lemon zest on top and have a red, white and blue 4th of July bread.  I think I'll post that variation soon and let you know how it works.  Grade A.

Monday, June 28, 2010

Day 178:Pepper Biscuit Pull Apart Bread

After all the cooking I did this weekend, I needed something simple for last night.  I found this recipe here.  It was really easy.  So easy, in fact, that my son Colton made this.

Pepper Biscuit Pull Apart Bread
10" dutch oven

1/4 tsp. garlic powder
1/4 tsp. salt
1/4 tsp. oregano
1/4 tsp. basil
4 1/2 tsp. olive oil
1 roll refrigerator biscuits
1/4 cup chopped green pepper (I didn't have one)
1/4 cup chopped red pepper (I used 1/2 cup)
1/2 cup mozzarella cheese
4 Tbs. Parmesan cheese

Combine first 4 ingredients and set aside.  Place the biscuits in a lightly oiled dutch oven.  Press lightly to join them together.  Brush with olive oil and top with peppers and cheeses.  Sprinkle with garlic powder mix.  Bake at 400° for 15-20 minutes.  Use 1 1/2 rings on top and 1 ring on the bottom.  Serves 4.

The Finished Product

Once again you are subject to my horrible photography skills--sorry!

The Review

This was really good.  I loved how easy it was.  This would be a good camping dish.  I was thinking it would be good with some bacon crumbles on top too.  I'll make this again when I need a quick bread to serve with a meal.  Grade B+.

Sunday, June 27, 2010

Day 177: Chicken Cordon Bleu with Smokey Raspberry Chipotle Sauce

For today's post, I thought I'd share the main dish I made at the cook off yesterday.  The cook off was a learning experience for me.  I was disappointed with the whole thing though.  Not that is wasn't well organized.  Some good friends of mine put it together, and as usual, they put a lot of time and thought into it.  I was disappointed in the turnout.  Only two people actually showed up to cook anything.  I'm still glad I did it though. 

First, it forced me to do everything by hand.  At home I'll throw the ingredients in the bread mixer, mix it up and bake it in the DO.  Not so at the cook off.  I had to knead and knead and knead and knead.  Let me tell you, it is no picnic trying to beat egg whites to stiff peaks with a wire whisk.

Second, it made me realize how NOT organized I am when I cook.  Even though I had planned out how I was going to do everything and had all my kitchen tools ready, it wasn't enough.  I really need to work on being more efficient and organized.  I just didn't  use my time as efficiently as I should have. 

Overall, it was a good experience for me.  I found where both my strengths and weakness are.  I also loved that making everything from scratch, using no electricity, outdoors is a real challenge.  I'm certainly not one to back down just because something is hard--I think this blog testifies to that!  : )  I have new found respect for both my pioneer ancestors, who crossed the plains with the Mormon wagon companies, and for the amazing cooks that turnout such beautiful foods at the cook offs around the country!

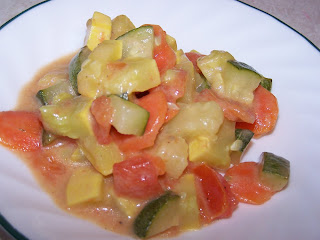
So you are probably wondering how I did!  With only two people cooking, I won the main dish category with today's recipe and the vegetable category with the vegetable tian.  I got a tripod and a cast iron cornbread skillet.  At least I didn't come home empty handed!

Chicken Cordon Bleu with Smokey Raspberry Chipotle Sauce
10" dutch oven

4 medium boneless,skinless chicken breasts
4 slices black forest ham
4 slices pepper jack cheese (or jalapeno jack cheese for the very brave)
2 Tbs. vegetable oil
kosher salt
fresh ground black pepper
raspberry chipotle sauce (recipe below)

On a cutting board, butterfly each breast and lay out flat, skin side down.  Place a slice of ham and a slice of cheese on each breast and close the breast around the filling.  Season both sides of the chicken with kosher salt and black pepper.
Heat the oil in a 10" dutch oven over a full spread of coals.  Carefully add the chicken to the hot pan, skin side down.  Cook for 2-3 minutes and then turn and cook 2-3 minutes more. 
Bake at 350°  for about 15 minutes or until a thermometer reads 155°.  Serve with Raspberry Chipotle Sauce.  Serves 4.

Raspberry Chipotle Sauce:

1 18 oz. jar raspberry preserves
1 Tbs. Chipotle peppers in Adobo Sauce, seeded, de-ribbed and finely minced
2 Tbs. cider or white vinegar
1/2 tsp. garlic powder
1/2 tsp. onion powder
1/4 tsp. cayenne pepper
kosher salt

Whisk all ingredients in a bowl.  Taste test for proper ratio of sweetness/tartness/heat.  Add more vinegar, cayenne or minced chipotle pepper if desired.  Remember, this sauce is supposed to knock you socks off.  Otherwise its just raspberry jam!

The Finished Product

This is a terrible pic!  I wish they looked as good as they tasted!

The Review

These were so good!  I don't know if I'll eat regular cordon bleu again.  Okay, I probably will, but I'll wish it had this sauce!  The raspberry sauce was FABULOUS!  It was tangy and smokey and just amazing.  I really loved the kick that the pepper jack cheese gave it.  The ones I made at home last week looked better, but there was no pressure to get them done and I could take a little more time.  Cordon bleu really isn't hard to make and I do it fairly often, but most people are to intimidated to try making it at home, but you really should try this!  Grade A.

Day 176: Chicken Broccoli Curry

Whew!  Sorry I didn't get this posted yesterday.  I ended up having no time at all!  Thanks for being patient.  I found this recipe here.  It looked like an easy and yummy dinner.  My kids all like broccoli, even the baby, so I figured they would all eat it.

Chicken Broccoli Curry
12" dutch oven

3 cups (or two 10-oz pkgs) broccoli spears (I used a California blend of veggies)
3 cups cooked chicken, cubed
1 10-oz can cream of chicken soup
1 10-oz can cream of celery soup
1 cup mayonnaise (use ‘reduced fat’ at your own risk...)
1/2 tsp curry powder
1 Tbs lemon juice
1-2 cups bread cubes
1/4 cup melted butter
1/3 cup finely chopped celery
1 Tbs dried minced onion (or 2-3 Tbs fresh minced)
2 Tbs dried parsley flakes
freshly ground pepper
1/2 cup grated cheddar cheese (optional)

Cook broccoli until barely done, drain well. I did this in my 12" oven with a full spread of coals then drained off the water.  Sprinkle broccoli with diced chicken.

Combine butter, celery, and onion in an 8" or 10" dutch oven and saute until tender. I used a full spread of coals.  Add parsley and pepper. Stir in bread cubes till combined. Set aside.

Combine soups, mayonnaise, lemon juice, and curry powder. Heat through until bubbly (I did this in the same 10" oven that I sauteed the veggies in).  Pour over chicken and broccoli.

Top with bread crumb mixture.

Bake at 350° for 30-40 minutes, or until hot and bubbling.  I used 1 1/2 rings on top and 1 ring on the bottom.  Remove from heat and sprinkle with grated cheese.  Cover and let stand until cheese is melted.

The Finished Product


The Review

This was surprisingly good.  I really didn't expect to love this.  My kids ate every bit and one child even scraped the DO to get the rest.  That doesn't happen very often.  The curry powder gave it a really nice flavor.  It was also really easy.  I could have made it a 1 pot meal without much trouble.  I would have sauteed the veggies first, set them aside.  Then boiled the broccoli and drained it, added the soup mixture and heated it in the pot with the broccoli, mix in the chicken, top with crumbs and bake.  It would be an easy camping meal.  I'll be making this one again.  Grade A-.

Saturday, June 26, 2010

My First Cook Off Menu

Good morning!  It is now 12:31 am at my house.  I was hoping to post tomorrow's recipe tonight, but I'm too exhausted to do it.  I've finally finished getting everything ready for the cook off and 5K run tomorrow and I'm going to bed!  I'm really hoping you have more important things to do on a Saturday morning than wait for me!  : )  The cook off ends at 2 pm, so after the judging and clean up I'll be headed home, prizes in hand (I hope), to rest up and recover before the rodeo tomorrow night.  So sometime tomorrow afternoon I'll post the recipe.

But before I collapse I thought I'd share my cook off menu with you.  I know this is just a small town cook off, but there are bound to be some great dishes prepared.  I know some of the other cooks entering, and they will be tough competition.  So here is my menu:

Entree:

Chicken Cordon Bleu with Smokey Raspberry Chipotle Sauce

Bread:

Raspberry Twist Bread

Vegetable:

Vegetable Tian  (This will probably be my weakest category)

Dessert:

Danish Cake

Wish me luck, and I'll post some pics of the cook off as soon as I recover from this week end!

Friday, June 25, 2010

Day 175: Grandma's Brownies

Hi everyone!  Just another quick post on this crazy day.  I can't seem to be home long enough to get anything done!  After tomorrow, I'll be back to normal!  I promise!  This is my grandma's brownie recipe.

Grandma's Brownies
12" dutch oven

2 cups sugar
1 cup margarine
4 eggs
3 squares unsweetened baking chocolate, melted and slightly cooled
2 1/4 cups flour
1/4 tsp. salt
1/4 tsp. baking powder
2 tsp. vanilla
1 cup broken nuts (I left these out--nut allergies)

Cream sugar and margarine until fluffy.  Beat in eggs.  Blend well then add melted chocolate and nuts.  Combine dry ingredients in a bowl, mix well then add to chocolate mixture and stir until combined.  Spread into a 12" dutch oven and bake at 325° for 30-35 minutes or until no imprint is left when touched with fingers.  Do not over bake.  Serves 12.

The Finished Product


The Review

I really can't say anything bad about grandma's brownies.  I think I got my love of cooking from her.  She was amazing.  As a general rule, I prefer fudgey brownies, but if I make cake brownies then these are the ones I want.  I'm eating one right now, in fact.  Sometimes we frost them, sometimes not, today is a not.  But they are yummy either way.  Grade A.

Thursday, June 24, 2010

Day 174: Herbed Oatmeal Bread

Could my day possibly have been any busier?  I'm ready to fall into bed and sleep until next week!  I spent the whole day shopping for the cook off on Saturday and also buying prizes for the 5K run that I'm organizing.  I think I've officially bitten off more than I can chew!  Oh well, only 2 more days and I'll be back to normal.  So please forgive my slothfulness for just another day or two.

This recipe is one that has been sitting in my "to try" stack forever.  I found it at Real Mom Kitchen, one of my (many) favorite food blogs. 

Herbed Oatmeal Bread
12" dutch oven

2 C water
1 C rolled oats
3 Tbsp butter
3 3/4 to 4 3/4 C all-purpose flour
1/4 C sugar
2 tsp salt
2 pkg. Active dry yeast
1 egg
1 Tbsp grated Parmesan cheese
1 tsp dried basil leaves
1/2 tsp dried oregano leaves
1/2 tsp garlic powder
6 Tbsp butter, melted

Bring water to a boil in a medium saucepan or an 8" or 10" dutch oven; stir in rolled oats. Remove from heat; stir in 3 tablespoons butter. Cool to 120 to 130 degrees F.

In large bowl, combine 1 1/2 cups flour, sugar, salt and yeast; mix well. Add rolled oats mixture and egg; blend at low speed until moistened. Beat 3 minutes at medium speed.

By hand, stir in an additional 1 3/4 cups to 1 1/2 cups flour to form stiff dough. Continue to mix the dough until smooth and elastic – about 5 minutes. Cover with a towel and let rest for 15 minutes.

Grease your dutch oven or use parchment paper. Punch down dough several times to remove all air bubbles. Divide the dough into 9 balls.  Shape and place the first roll in the center of the 12" dutch oven.  Shape and place the remaining rolls around the one in the center and cover.

Let rise in warm place (80 to 95 degrees F) until light and doubled in size, about 45 minutes.

In small bowl, combine Parmesan cheese, basil, oregano and garlic powder; mix well. Set aside.

Spoon 4 tablespoon of the butter over the roll dough.

Bake at 375° F for 15 minutes. I used 1 1/2 rings plus 2 coals on top and 1 ring on the bottom. Brush remaining 2 tablespoons butter over bread. Sprinkle with Parmesan cheese-herb mixture. Bake for an additional 10 to 15 minutes or until golden brown. Serve warm or cool.  Watch the tops toward the end of cooking so they don't over brown.

The Finished Product


My rolls always turn out a little ugly looking, but at least they taste good!

The Review

These were yummy.  I got impatient and didn't knead mine enough so they weren't as light as they should have been, but they were still delicious.  They would be great paired with and Italian meal or any kind of soup.  Heck, I'd make sandwiches with them for lunch if I thought there would be any leftover.  Not only did they taste great, but the oatmeal makes them heart healthy as well!  (Doesn't it?  I think it should!)  What I'm saying is that you really should try them!  They worked perfectly in the dutch oven.  Grade A.

Wednesday, June 23, 2010

Day 173: Lemon Herb Chicken Bake

Yesterday was a busy day!  We spent several hours in the garden catching up on all the weeding, then I got to go see Shrek 4 with my hubby.  What a great movie!  I laughed through the whole thing.  After that there were 2 baseball games and I had to finish preparing for the 5K race I'm in charge of on Saturday.  In between all that I had to cook dinner.  Luckily, I found a simple dish that looked delicious.  I found this recipe here.

Lemon Herb Chicken Bake
10" dutch oven

4-6 chicken breast thawed and trimmed
5-6 med red potatoes - cut into chunks
1 C peas (frozen)

In a sauce pan combine the following and let simmer for 3-5 minutes

1/4 C. Butter
3 TB Lemon juice
3 TB Minced dried onion
1 TB Rosemary blend spice (I used rosemary, thyme and a little sage)
3/4 tsp garlic salt
Heaping 1/2 tsp. lemon pepper
1 tsp. Sugar
2/3 Cup 1/2&1/2 (I used whipping cream)

Sprinkle on right before baking

1/2 C fresh Parmesan cheese

Place chicken in your dutch oven, cover with red potatoes and peas and pour sauce over the chicken and vegetables and sprinkle cheese on top.

Bake at 400° for 40 minutes to 1 hour until bubbly and potatoes are browning.  Use 1 1/2 rings on top and 1 ring on the bottom.

The Finished Product


The Review

This was fabulous!  It was also easy.  I had the whole thing put together in about 15 minutes.  My oldest son ate 4 helpings and still wanted more.  Its a good thing I doubled the recipe.  It has a very subtle lemon flavor and is just delicious.  I baked mine for 45 minutes and it wasn't quite long enough.  Everything was cooked, but not as tender as I would have liked.  Next time I'll reduce the heat a little and cook it for at least an hour.  I think I will also thicken the sauce with some roux.  It was pretty thin by the time the chicken juices were released during cooking.  I will definitely be making this again, in fact most of my family wants it for dinner again tonight.  Grade A.

Tuesday, June 22, 2010

Day 172: Baked Potato Skins

I've been trying to figure out what to cook for the cook off this weekend.  I think I've just about settled on a menu, finally.  This is such a small town cook off that I'm not sure how gourmet to go.  I don't want to go there and show everyone up just because I do this everyday.  Okay, so maybe I do, but still...  They are having 4 categories: main dish, bread, vegetable and dessert.  Obviously this won't be an IDOS sanctioned event, but there will be some pretty good prizes, and I could use another 12" dutch oven, at least.  I think I'll enter the main dish, bread and dessert, for sure.  That is going to be a lot of work by myself, but if I can think of a good veggie that is really easy I may throw that one in too.  I'll post my entries on Saturday morning.  I wouldn't want to give any of my competition to much of a heads up!  LOL!

I'm going to have some great desserts to post next week!  I'm still working on the dessert competition for the Arkansas Dutch Oven Society.  I have 2 more to try before I pick the winner.  I have been doing a TON of dutch oven cooking the last little while, so forgive me if I post some simple, easy, but yummy recipes for the next few days. 

Baked Potato Skins
DO size depends on how many you make

Russet potatoes, scrubbed and pierced with a fork
Shredded cheddar cheese
bacon crumbles
sour cream or ranch dressing

Bake the potatoes in your dutch oven at 400° for 40-45 minutes or until tender.  Remove from oven and allow to cool until they can be handled.  Cut each potato in half lengthwise and scoop out the insides leaving about 1/4" shell of potato.  Fill each potato with shredded cheese and bacon crumbles.  Return to oven and bake until cheese is melted and potatoes are heated through.  Top with sour cream or ranch dressing.

The Finished Product


The Review

Baked potatoes worked surprisingly well in the dutch oven.  I wasn't sure how well they would work, but I really shouldn't have doubted.  Everything seems to work better in the DO.  We had these with grilled steak and I loved not having to heat up my kitchen.  I didn't put quite enough cheese in mine, so next time I'll put more.  I also use store bought bacon crumbles since I was short on time.  This is a great side dish and the kids thought they were really fun.  We will make these again.  Grade A.

Monday, June 21, 2010

Day 171: Mexican Rice

Good Morning!!  I'm headed out to the garden to pick the first veggies of the year.  I can't wait!  zucchini is one of my (many) favorite veggies.  I've also got a couple of tomatoes on the vines that should be ready in a few weeks.

For Father's Day my hubby requested Chicken Enchiladas.  It is one of my family's favorites and since its pretty easy I don't mind making it.  I had some sauce leftover, so I used it for Mexican Rice.

Mexican Rice
10" dutch oven

2 Tbs. vegetable oil
1 cup long grain rice
2 cups chicken broth
1/2-1 cup enchilada sauce or  1 (8oz.) can tomato sauce
chopped onion, green pepper and green chilies, if desired
chili powder, cumin, garlic powder and red pepper to taste

In your dutch oven, with a full spread of coals, cook the rice and vegetables in oil until rice is lightly browned.  Add the chicken broth, enchilada or tomato sauce and spices.  I add more spices when I use tomato sauce since the enchilada sauce already has spices in it.  Bring to a boil.  Cover and reduce the heat so the rice is simmering.  I moved a few coals to the top to help keep the heat in.  Simmer 20 minutes or until rice is tender.  Serves 4-6.

The Finished Product


The Review

This turned out pretty good for a recipe I made up as I went along.  I didn't put the veggies in this one because I knew most of my kids wouldn't eat it with onions and peppers.  I did add a half a can of green chilies, though.  It wasn't the perfect rice recipe by any means, but there weren't any leftovers either.  The enchilada sauce I make is so yummy I could eat it plain, so it goes with out saying that anything I put it on will be good.  We gave this a B+.

Sunday, June 20, 2010

Day 170: Parmesan Potato Halves

I couldn't sleep last night so I was reading through a lot of the old comments that have been left on the posts.  I really have to say thanks to everyone for sharing this experience with me.  You are all so encouraging and willing to share tips, ideas and opinions.  Its crazy to think that I am almost half way through the year.  Dutch oven cooking and this blog have been really fun, stressful, frustrating, liberating and learning experiences for me.  I have been lucky to meet so many amazing people (you know who you are) through the blog and I have had some great experiences.  This whole experience has really made me stretch and learn and grow as a person and as a cook.

Its funny, but I have already reached all the goals that I made when I started this, so it is time to make some new ones.

First--I would like to qualify for the World Championship Cook-offs sometime in the next 2 or 3 years.  I have to give myself some time to reach this goal.  With my large family and small children I'm not always able to put as much time into things as I would like.  And I still have a lot to learn about dutch oven cooking and cooking in general.  But one day soon I'll be there!

Second--I would really love to do a dutch oven cookbook.  Not a camping cookbook, but an "everyday, cook at home because dutch ovens are fun" cookbook.  There are dozens of camping cookbooks out there.  I want people to see just how versatile these ugly black pots are.  They aren't just for camping anymore!  And I want to see it on the shelves at Cabela's!  How's that for a lofty goal?!?

Third--This may not be a dutch oven goal, but I think it is a good one nonetheless.  I want to encourage everyone to try something new.  Even if you don't think you have the time.  Find something you have to do anyway and learn to do it in a different way.  That's what this year and this blog started as for me.  I was a "stuck in a rut stay at home mom" and by the end of the year I hope I'm a dutch oven expert!

Okay, recipe time.  I found this one here

Parmesan Baked Potato Halves
12" dutch oven

6 small potatoes, scrubbed and cut in half
1/4 cup butter
grated Parmesan cheese (Lots)
garlic powder
other seasonings (I used Schilling's Salad Supreme, kosher salt, and pepper, but use what you like best!)

 Melt butter in your 12" dutch oven.   Generously sprinkle Parmesan cheese and lightly sprinkle other seasonings all over the butter. Place potato halves face down on the butter and seasonings. Bake at 400* for 40-45 minutes or until potatoes are tender.  I used 2 rings on top and 1 ring on the bottom.   Cool for 5 minutes before removing from pan.  Serves 8-10.

The Finished Product


Sorry, my hubby had my camera so the pic is from Family Favorite Recipes.

The Review

Oooh these were good!  Be sure to use plenty of Parmesan cheese.  You want it to get nice and crispy and thick on the potatoes.  I didn't use quite enough on mine so they weren't as flavorful as they could have been, but we still loved them.  I think these are good enough to serve to company.  Be sure to let them sit for at least 5 minutes before you serve them, it helps the cheese to stay on the potatoes instead of the bottom of your pot.  These get an A, and I just might have them with dinner tomorrow night, too!

Saturday, June 19, 2010

Day 169: Oatmeal Carmelita's

Yesterday, my hubby took off to run the Wasatch Back relay with a team of public safety personnel in our area.  It is a 188 mile relay race from Logan, Utah to Park City, Utah.  I personally think he's crazy.  Why would I run that far when I have a perfectly good car to drive?  But he loves it, so who am I to complain.  Anyway, he wanted me to buy him some treats to take with him.  But being the frugal gal that I am, I made treats instead.  I figured he'd need some carbs to keep his energy up and lots of sugar to keep him awake during his midnight run.  So I chose these little goodies.

Oatmeal Carmelita's
10" dutch oven

1 cup flour
1 cup quick-cooking oats
3/4 cup brown sugar
1/2 t. soda
1/4 t. salt
3/4 cup margarine, melted
1 cup semi-sweet chocolate chips
1/2 cup chopped pecans (I'm allergic to pecans so I used peanuts)
3/4 cup caramel ice cream topping
3 T. flour

In a large bowl, combine flour, rolled oats, brown sugar, soda, salt.  Melt the butter in a 10" dutch oven.  Mix the flour mixture into the butter until crumbly.  Remove about 1/2 of the dough from the pan and set aside.  Very carefully press the dough into the dutch oven.  Bake at 350* with 1 ring on the top and bottom for 10 minutes. Sprinkle with chocolate chips and pecans. Blend caramel topping and 3 T. flour; pour over chocolate and pecans to cover. Sprinkle with remaining crumbs. Bake 15-20 minutes longer or until golden brown. Chill 1-2 hours. Cut into bars.

The Finished Product


The Review
 
I cut these while they were warm and they were ooey, gooey and delicious.  They were equally yummy cold.  I love that I can do everything in 1 pot.  My kids have been begging me to make more, and I just don't have the heart to refuse.  Besides, I can't resist chocolate and caramel together.  I may even make this when we go camping.  It comes together so fast and is so easy.  Next time I may throw in a few marshmallows for fun.  I'm afraid these will be making regular appearances at our house.  Grade A.

Friday, June 18, 2010

Day 168: Strawberries and Cream Banana Bread

I finally finished the post on the Dinwiddie method of temperature control.  I've been working on it forever trying to explain it clearly.  If you haven't read it yet, it would be worth the time. Its in the previous post. It is my new method of figuring temperature.  It has made my life a lot easier.

For today's recipe, I had some strawberries I needed to use.  When I found this recipe, I knew I had to try it.  Especially after the last distasterous strawberry bread I made.  I tend to be a little stubborn and tenacious when it comes to making thing work the way I want them to and strawberry bread is no exception.  I had high hopes for this one even from the batter stage.


Strawberries and Cream Banana Bread
10" dutch oven

2 cups plain flour
1 teaspoon baking soda
1/2 teaspoon baking powder
1/2 cup brown sugar
1/2 cup white sugar
1/2 cup butter or margarine
2 eggs
1/2 cup sour cream
1/2 teaspoon vanilla
3 mashed bananas
1 cup chopped strawberries

In a mixing bowl, mix the flour, baking soda and baking powder together.
In another bowl, cream together the butter or margarine and sugars. Then add in the eggs, vanilla, sour cream and mashed bananas and mix thoroughly. Stir in the chopped strawberries.
Slowly add the flour mixture into the wet ingredients, stirring well as you go.
Pour the mixture into your prepared loaf pan and bake on 350F for around 1 hour or until a toothpick inserted in the center comes out clean.  Mine took about 45 minutes.
Allow to cool for 10 minutes in the loaf pan before removing and placing on a wire cooling rack to cool fully.

The Finished Product


The Review

Well, I can stop looking for a good strawberry bread recipe.  This was fabulous!!  It was soft and moist and delicious.  It tasted more like banana bread, but when you hit a chunk of strawberry, the flavors blended perfectly.  This recipe is a keeper.  Grade A.

The Dinwiddie Ring Method of Temperature Control

I've been using the Dinwiddie Ring Method for a couple of weeks now, and I really like it.  My confidence level has really shot up, and my dutch oven cooking has become MUCH less stressful.  I really wish I would have known about this method sooner.  I have 6 or 7 dutch oven cookbooks, and they all use coal counting.  I haven't seen one yet that teaches this method.  I wonder why that is?

First, let me tell you why I like the ring method over coal counting.  With the ring method, I can use any brand of charcoal on the market.  (Even Kingsford, which I have also been using with great success for the past few weeks.)  I can even mix brands of charcoal with out any problems.  I can also use any size of charcoal without having to compensate for the size differences between brands.  For instance, I had been using Sam's Choice brand charcoal for most of the year.  It is twice as big as Kingsford charcoal and therefore puts out more heat and burns longer than Kingsford.  If I'm using 20 Kingsford briquettes, they are putting out less heat than 20 Sam's coals.  But with the ring method, I don't have to compensate for any of that.

I know you have all seen the Lodge Temperature Control Chart.  It is really complicated and I couldn't cook without consulting the chart to see how many coals I needed.  The Dinwiddie Method's chart is much easier to remember and I don't have to check it before I cook every time.


Here are the basics:

1 ring:  If you make a circle of hot charcoal with all of the briquettes lying flat and touching each other, with spaces left out for the legs on the bottom rings, that is "one ring".  The outside edge of the ring is lined up with the outside edge of the pot, top or bottom.  For the record, I still use the coal counting method for the bottom heat.  I take the size of the oven, subtract 2 and that is the number of bottom coals I use.  I've found that if I use a full ring on the bottom I tend to burn my food.

1/2 ring:  A "half ring"  is the same size circle but with every other briquette missing.

2 rings:  is simply a second ring just inside the first, with the rings touching.

Full spread:  Means to put all the briquettes you can (one layer deep, lying flat) either under or on top of the pot.

The ring method is self correcting for the size of the briquettes used.  If your charcoal has been burning a while, the pieces will be smaller and will put out less heat.  But it will take more of them to make a ring, so you still get about the same temperature.  As the briquettes burn down, you simply add more to fill in the spaces and keep the temperature constant.

  Duane Dinwiddie found that he could cook almost everything there is with just four temperatures--slow, medium, hot and very hot.  For a 12" dutch oven, slow will have 1 ring on top and one ring on the bottom and be 300* (+/- 25*).  Medium is 1 ring under and 1 1/2 rings on top and is 350* (+/-25*).  A hot oven is 1 ring under and 2 rings on top and is 400* (+/-25*).  A very hot oven is 1 ring under and 2 1/2 rings on top and is 450*  to 500*(+/-25*).

The following chart shows this method in detail.


If I could go back and start this year over, I would like to do it with this method of heat control.  It would have saved me a lot of frustration.  I'm going to be teaching several dutch oven classes over the summer and you can be sure that coal counting will be mentioned only as a secondary method of temperature control.

Thursday, June 17, 2010

Day 167: Orange Chicken

I know, I know, I know!  I'm late today.  It has been one of those days from "you know where"!  I had to leave unexpectedly early this morning and just got home a few minutes ago.  Thankfully, nothing is wrong, I just had a few things that I couldn't put off any longer.   Please forgive me! 

Whenever we go to the mall, which isn't often, we make a stop at Panda Express.  I love their orange chicken, and I get it every time.  When we got home last time, I decided to look for a copycat version online.  I knew I wouldn't have to look farther than my favorites list.  I found this at My Kitchen Cafe.

Orange Chicken
12" dutch oven

2 pounds boneless, skinless chicken breasts, cut into 2″ cubes
1/2 cup flour
1 teaspoon garlic powder
1/2 teaspoon pepper
2 tablespoons oil or butter

Sauce:
1 1/2 cups water
1/4 cup plus 2 tablespoons fresh orange juice
1/3 cup rice vinegar
2 1/2 tablespoons soy sauce
1 tablespoon orange zest
1 cup brown sugar
1/2 teaspoon finely minced ginger
1 teaspoon minced garlic
2 tablespoons green onion
3 tablespoons cornstarch
1/4 cup water

In a shallow dish combine the flour, garlic powder and pepper. Dip each piece of chicken in flour mixture and coat evenly.  Pour oil (or melt butter and pour) in your dutch oven.  Bake 30 minutes at 350 degrees.  I used 1 1/2 rings on top and 1 ring on the bottom or 14 coals on top and 10 on the bottom

Meanwhile, in a 10" dutch oven,  combine water, fresh orange juice, rice vinegar, soy sauce, orange zest and whisk over medium heat for a few minutes. I used as many coals as I could fit under my dutch oven.  Then stir in brown sugar, ginger, garlic, and green onion and let it come to a boil. Combine cornstarch with water and let it dissolve and add it to the sauce until thickened.

After chicken has baked the 30 minutes, turn each piece over and pour the sauce mixture evenly over chicken. Bake another 30 to 40 minutes basting frequently.  Serve over rice.  Serves 4-6.


The Finished Product


This mountain of food was on my 15 year old son's plate.  He still complained about being hungry!

The  Review

We loved this!!  I mean, we really loved this!  The only place I ever eat Orange Chicken is Panda Express in the mall.  And the mall is quite a drive for me since we live in "hickville".  I'm glad to be able to make it at home.  Is this as good as Panda Express?  Probably not, but I'm still going to make this version as many times as possible.  It was sweet and tangy and the chicken was fork tender.  It was also super easy to put together.  You really should make this...soon!  Grade A.

Wednesday, June 16, 2010

Day 166: Rich Truffle Wedges

I've been looking for desserts to make in this cook off I'm entering in a few weeks.  So far, I haven't been able to decided on one.  Nothing has knocked me off my feet.  Would it be cheating to use something out of the World Championship Cook off cookbook?  Hmmmm...I'll have to think about that one.  This recipe came from a Taste of Home cookbook.

Rich Truffle Wedges
10" dutch oven

Cake:

1/2 cup butter or margarine
6 (1 oz.) squares semisweet chocolate, chopped
3 eggs
2/3 cup sugar
1 tsp. vanilla extract
2/3 cup flour

Glaze:

1/4 cup butter or margarine
2 (1 oz.) squares semisweet chocolate
2 (1 oz.) squares unsweetened chocolate
2 tsp. honey

Sauce:

2 cups fresh of frozen raspberries
2 Tbs. sugar

In you dutch oven melt the butter and chocolate, stir until smooth.  I used 5 or 6 coals under my DO.  Remove from pan and cool 10 minutes.  In a mixing bowl, heat egg, sugar, vanilla and salt until thick, about 4 minutes.  Blend in chocolate mixture.  Stir in flour; mix well.  Pour into a 10" dutch oven that has been lined with parchment paper.  Bake at 350* for 25-30 minutes or until a toothpick comes out clean.  Cool completely on a wire rack.
 
Combine the glaze ingredients in an 8 or 10 inch dutch oven.  Cook and stir over low heat until melted and smooth.  I used 4 or 5 coals for this.  Carefully remove cake from pan and take off parchment paper.  Spread glaze over the top and sides; set aside.  For the sauce, puree the berries and add the sugar.  Spoon sauce over individual servings.  8 servings.

The Finished Product


The Review

We really liked this dessert.  It was fudgy and the berries gave it good flavor, but it wasn't "truffley" at all.  I probably won't make it again.  It was a lot of work for something that was kind of a "high class" brownie.  We all gave this one a B.

Tuesday, June 15, 2010

Day 165: Sweet Potato Fries

I've recently learned to like sweet potatoes.  Now I'm trying to help my kids to like them.  They are so nutritious that they really should be part of every one's diet.  I've been trying to introduce the sweet side of sweet potatoes and now we are going for savory.  I've seen recipes for these all over the Internet in the last few months, but do you think I could find on last night?  So I just made up my own.

Sweet Potato Fries
14" dutch oven

Sweet potatoes, peeled and sliced into fries
Olive oil
Salt and pepper
Chipotle seasoning

Toss fries with olive oil.  Spread out in your dutch oven in a single layer.  Sprinkle with desired seasonings.  Bake at 450* for 20-30 minutes or until fries are soft.  I used 3 rings on top and 1 ring on the bottom or 26 coals on top and 14 on the bottom. 

The Finished Product


The Review

My kids really liked these.  The only complaint they had was that they weren't crispy.  That's it.  I was ready for a fight to get them to eat.  The chipotle seasoning added a little zip that was nice, but you could use any spices you want.  I was thinking curry powder would be good too.  They are good with both ketchup and fry sauce.  (For you poor souls that don't know what fry sauce is...google it!  Its a local favorite!)  I used 2 large sweet potatoes and it wasn't enough.  My 2 year old didn't eat anything but these fries.  Once again, I cooked some indoors and some outdoors.  Needless to say, the dutch oven fries won again.  These will receive an encore appearance at our house!  Grade B+.

Monday, June 14, 2010

Day 164: Artichoke Stuffed Chicken

Its been raining here for the last 3 days.  I was bummed because I really want to try making crepes in my dutch ovens and I was finally going to have time this weekend.  Maybe I'll get lucky and they will be tomorrow's post!  : )  I got today's recipe from a cooking class that was sponsored by a local grocery store.

Artichoke Stuffed Chicken
10" dutch oven

4 boneless, skinless chicken breasts
1/2 bag (5 oz.) fresh spinach, trimmed and coarsely chopped
2 cups shredded mozzarella cheese, divided
1/2 cup shredded Parmesan cheese
1/2 jar sun dried tomatoes in oil, drained and coarsely chopped
1 large shallot, chopped
3 cloves garlic,chopped
1 small jar marinated artichoke hearts, drained and coarsely chopped
1 cup panko (I used regular bread crumbs)
4 Tbs. butter, divided
1 packet pesto sauce (I used Knorr)
2-3 eggs
2 Tbs. water

In a large bowl, mix together spinach, cheeses, sun dried tomatoes and artichoke hearts; set aside.  In a shallow bowl, beat together eggs and water, in another shallow bowl add panko; Set aside.  In your 10" dutch oven, melt 1 Tbs. butter, add the shallot and garlic and saute until tender; add to the spinach mixture.  Toss spinach mixture lightly together to mix. 

Flatten the chicken breasts to 1/4 inch thickness, place spinach mixture onto chicken breasts, roll chicken tightly and secure with toothpicks; repeat with other chicken.  Dip chicken into egg wash, then in panko crumbs until coated evenly.  In your dutch oven, melt remaining butter; place chicken in the dutch oven and brown in butter on all sides.  I used as many coals as I could fit under my dutch oven.  After chicken is browned, bake at 350* for 30 minutes or until the chicken is thoroughly cooked.  I used 1 ring on top and 1 ring on the bottom or 12 coals on top and 8 coals on the bottom.

 In the meantime, prepare the pesto according to package directions.  (I did the pesto in my kitchen.)  When the chicken is done, remove it from the heat and spoon the pesto sauce on top and sprinkle with cheese.  Place the lid back on the dutch oven and allow the residual heat melt the cheese.  Serves 4.

The Finished Product


The Review

I was worried that the kids would like this, so I made them some BBQ chicken instead.  I really shouldn't have worried.  Even my little ones loved this chicken.  They really surprise me sometimes.  I thought this was fabulous!  I love sun dried tomatoes and artichokes.  Put them together with spinach and I'm in heaven.  These were surprisingly easy to make but they looked like I spent a lot of time in the kitchen.  I love serving this kind of thing to company, so I'm looking forward to when my in-laws visit again.  This recipe is a keeper!  Grade A-.

Sunday, June 13, 2010

Day 163: Cream Biscuits

I've been going over recipes from the Arkansas Dutch Oven Society's site.  If you remember, I was asked to judge the dessert recipe contest.  I have to laugh, I was at the Arkdos site today and they announced they are having a dutch oven celebrity judge the contest.  They can't be talking about me, can they?  I'm just a gal muddling my way through learning something new! 

I've narrowed the recipes down and I have several on my short list.  I'm going to spend next weekend making my favorites and picking the winner.  If you haven't visited their site yet, you really should.  There are a lot of great pics from their DOG (dutch oven gathering) events and the recipes alone are worth the trip to the site.  You can check it out at this link.  I have also added a permanent link in my blog roll in the right hand column.

I haven't made biscuits for a while, so I thought it was time to try them again.  They were still a struggle last time, and heat was still an issue.  I'm happy to report that I am no longer struggling with either of them.  Heat has become much easier and so have biscuits.  I found this recipe here.

Cream Biscuits
12" dutch oven

3 tablespoons melted butter
2 cups all-purpose flour, plus more for dusting the surface
1 tablespoon baking powder
1/2 teaspoon salt
1 tablespoon sugar (optional)
1 1/2 cups heavy cream (I used whipping cream)

Mix two cups flour, the baking powder, salt and (if using) sugar into a large bowl. Fold in 1 1/4 cups cream. If the dough is not soft or easily handled, fold in the remaining 1/4 cup cream, little by little.  I used the full 1 1/2 cups of cream.

Turn the dough onto a floured surface, mound it into a ball and, using your hands, gently press it to a thickness of about 3/4 inch. It does not need to be completely smooth across the top. Cut into rounds, 2 1/2 inches in diameter. Gather dough scraps and continue to make rounds. Place the biscuits in a lightly greased dutch oven and brush with butter. Bake at 425* using 2 rings on top and 1 ring on the bottom or 21 coals on top and 10 on the bottom.  Bake until golden, 12 to 15 minutes (Mine took more like 20-22 minutes).  Makes 10-12 biscuits.

The Finished Product

Perfectly browned bottoms!

The Review

I have found my new favorite biscuit recipe--hands down!  These were amazing!  They were light, fluffy, flaky, soft and delicious.  Its to bad I'm out of cream or I would make another batch right now.  You really have to try these.  I'm thinking biscuits and gravy.  This will go in my tried and true file.  Grade A.

Saturday, June 12, 2010

Day 162: Golden Potatoes

Summer is the craziest time of year!  My schedule seems to change by the hour and sometimes by the minute.  I'm always on the look out for fast, easy and yummy side dishes.  When I saw this recipe in a cookbook I knew I had to give it a try.  With only 5 ingredients, this couldn't be easier.

Golden Potatoes
10" dutch oven

2 (16 oz.) cans whole white potatoes, drained
1/4 cup butter or margarine, melted
1/2 tsp. seasoned salt
3 Tbs. grated Parmesan cheese
1 Tbs. fresh minced parsley

Place potatoes in your DO.  Pour butter over the potatoes.  Sprinkle with seasoned salt, cheese and parsley.  Bake at 350* for 25 minutes or until lightly browned.  Use 1 ring on top and 1 ring on the bottom or 12 coals on top and 8 coals on the bottom.

The Finished Product


The Review

This was really good for such a simple recipe.  I had it put together in less than 5 minutes.  I think I'll keep some canned potatoes around for those super busy nights.  This would also be a great camping dish.  I didn't cook mine long enough so they didn't get very "golden".  We had company that afternoon, so by the time we cooked dinner we were to hungry to let them finish cooking.  We all gave these a B.

Friday, June 11, 2010

Day 161: Cinnamon Rolls

I keep hoping we will settle into a summertime routine soon.  Its chaos around here with all the kids home.  But we decided we needed to make a treat to celebrate the fact the the garden is  finally in.  I only had to plant it twice thanks to Mother Nature.  Oh well, its good practice for my kids and they love to plant anyway. 
We wanted a special treat that we don't get very often,and cinnamon rolls fit the bill.  I don't make these very often, but I should because they aren't very hard and they're delicious.  I got this recipe from Cindy Boyer at the IDOS Spring Convention.

Cinnamon Rolls
14" dutch oven

Dough:
5-6 cups flour
2 Tbs. active dry yeast
2/3 cups sugar
1 Tbs. salt
1 (12 oz.) can evaporated milk, warmed
1/2 cup milk, warmed
1 egg, beaten
1/3 cup butter, melted

Filling:
2 Tbs. butter
2 cups brown sugar
2-3 Tbs. cinnamon

Frosting:
1/2 up butter or margarine
1 (8 oz) pkg. cream cheese, softened
4 cups powdered sugar
2 tsp. vanilla

For the dough:  In a mixing bowl combine 2 cups flour, yeast, sugar and salt; blend well.  Mix in the warm evaporated milk and warm milk, egg and melted butter.  Mix thoroughly.  Mix in remaining flour, 1 cup at a time, until the dough pulls away from the sides of the bowl.  Turn out onto a floured surface and knead it for 5 minutes until dough becomes elastic and sticky.  Roll dough generously in flour, then cover and place in a warm area to rise until double.

Assembly:
Punch the dough down and roll into a rectangle about 9 x 13 inches.  Brush dough with melted butter, spread on brown sugar and sprinkle on the cinnamon.  Roll up jellyroll style starting with the long end.  Cut into 13 1 inch rolls.  Place rolls in a lightly greased 14" dutch oven with 8 rolls around the outside edge, 4 rolls forming an inner circle, and 1 roll in the center.  Cover dutch oven and let rise 15 minutes.
Bake using 10 briquettes on the bottom and 18-20 on top, until rolls are lightly browned.  Total baking time will be between 20 and 30 minutes.  For even browning rotate the oven and lid every 10 minutes.  Cool and frost.

Frosting:
Cream butter and cream cheese in a bowl.  Gradually add sugar and vanilla; beat well.  Spread on cooled rolls. 

The Finished Product

Before the frosting!

The Review

I doubled this recipe and baked some in my kitchen and some in my DO.  Can you guess which ones turned out better?  You guessed it, big surprise, the DO rolls were better.  I don't know why I'm still surprised by that.  These cinnamon rolls were ooey, gooey and delish!  I wish I could eat them everyday!  But since I'm already getting fat from all the good food we've had around, I'll refrain.  This recipe gets an easy A.

Thursday, June 10, 2010

Day 160: City Chicken

Sorry everyone!  I must not have clicked the right button this morning so the post didn't show up.  Its here now!

Today's recipe is one of the very first recipes I learned to cook.  I've been making it for easily 10+ years.  I found it in a recipe magazine and I've made it so many times I have it memorized.  Back then, this was a nice change from shepherd's pie (which I have only recently been able to eat again) and tater tot casserole (which I still, after 15 years, can't eat). It is super easy.  The original recipe called for the chicken to be put on skewers, but as my family has grown I found it takes too much time, so I just fry up the chicken chunks.

City Chicken
12" dutch oven

4 large boneless, skinless chicken breasts, cut into chunks
1 cup flour
2 tsp. garlic powder
1 envelope Lipton onion soup mix
2 cups chicken broth
1 cup water
Hot cooked rice or noodles

In a bowl, mix the flour and garlic powder.  Roll the chicken in the flour and fry in your DO in some oil.  I used as many coals as I could fit under my DO.  When the chicken is lightly browned, sprinkle with the soup mix.  Add the chicken broth and water.  Bring to a boil.  Reduce heat and simmer 1 hour.  Serve over rice or noodles.  Serves 6.

We were in such a hurry to eat and get to ball games that I didn't take time to take a pic!  Sorry!  I'll try to add one later.

The Review

This recipe has stood the test of time.  You know it is a good one if you still like it a decade later.  My kids love it and there are never any leftovers.  The gravy thickens all by its self as it simmers, and it is fabulous!  This one is definitly a keeper!  Grade A.

Wednesday, June 9, 2010

Day 159: Yellow Squash Casserole

We have started have a "veggie night" at our house.  My kids seem to think that veggies are of the Devil and won't eat them as well as they used to.  To help combat the evil influences, we have instituted "veggie night" once a week.  On these nights, no meat is allowed, not even a hot dog after dinner.  Its a bit of a challenge to find new ways to cook veggies that my kids will like.  They aren't very daring food wise.  I know, I'm shocked too!  You'd think with all the new stuff we're eating they would be the Evil Knievels of food.  So for our first ever veggie night we served this summer squash casserole.  I found this recipe here.

Summer squash Casserole
12" dutch oven

2 pounds yellow squash, sliced
1 onion, sliced
1 can cream of chicken soup
1 cup sour cream
1 cup cheddar cheese, shredded
salt and pepper to taste
1 (6 ounce) package dry stuffing, prepared according to box directions

Boil the yellow squash and onion together in a DO filled with water, until they are soft. Drain and place in a large bowl. I left mine in the colander to drain completely.  Mix together the soup, sour cream, cheese and salt and pepper. Add the soup mixture to the squash and onions and mix well. In your DO, layer half of the stuffing, then pour on all of the squash mixture, followed by the remaining stuffing. Bake in a preheated 350° F oven for 40 to 45 minutes, or until hot and bubbly and stuffing on the top is slightly crunchy. Use 1 1/2 rings on top and 1 ring on the bottom or 14 coals on top and 10 on the bottom.

The Finished Product

I have to admit, forgot to take a pic, so I stole this pic from the site where I found the recipe. 

The Review

This was pretty good.  It is a great way to use up an over abundance of squash and I had some in the fridge that needed to be used.  I used a combination of zucchini and yellow squash.  Mine needed more stuffing so next time I'll use 2 boxes.  I'll probably make this again when I have a ton of garden produce.  It was really easy, and my family liked it.  I think I'll give this one a B.

Tuesday, June 8, 2010

Day 158: Lemon Whirligigs with Raspberries

Today, my oldest son is getting his learners permit (hopefully).  So this will be a quick one!  I was thinking of adapting this recipe to use in a cook off.  It needs a bottom crust to be able to be served on a DO lid.  I was planning on coming up with a crust, but as it was, I didn't have time. 

Lemon Whirligigs with Raspberries
10" dutch oven

2/3 cups sugar
2 Tbs. cornstarch
1/2 tsp. ground Cinnamon
1/8 tsp. ground nutmeg
1/2 tsp. salt
1 cup water
3 cups fresh raspberries

Whirligigs:

1 cup flour
2 tsp. baking powder
1/2 tsp. salt
3 Tbs. shortening
1 egg, lightly beaten
2 Tbs. half and half
1/4 cup sugar
2 Tbs. butter or margarine, melted
1 tsp. grated lemon peel
Whipping cream and additional raspberries

In an 8 or 10" DO, combine the sugar, cornstarch, cinnamon, nutmeg and salt.  Gradually add water; bring to a boil.  I used as many coals as I could fit under my DO.  Reduce heat to medium; cook and stir until sauce thickens.  Place raspberries in a 10" DO; pour the hot sauce over the top.  Bake at 400* for 10 minutes; remove from heat and set aside.

For the whirligigs:

Combine the dry ingredients in a bowl; cut in shortening until crumbly.  Combine the egg and cream; stir into dry ingredients to form a stiff dough.  Shape into a ball; place on a lightly floured surface.  Roll into a 12 x 6 rectangle.  Combine sugar, butter and lemon peel; spread over dough.  Roll up, jelly roll style, starting with the long side.  Cut into 10 slices; pat each slice slightly to flatten.  Place on top of the berry mixture.  Bake at 400* for 15 minutes or until the whirligigs are golden.  Use 1 1/2 rings on top and 1 ring on the bottom.  Garnish with cream and raspberries.  Serves 10.

The Finished Product


The Review

This was really good.  The whirligigs had a great lemon flavor the complimented the raspberries perfectly.  It was also really easy to make.  I personally think it needs a nice lightly lemony crust, but like I said, I didn't have time to come up with one.  That will have to become one of my projects.  I'll make this again, especially for company.  Its really pretty.  This gets a B+.

Monday, June 7, 2010

Day 157: Parmesan Vegetable Gratin

I think I've decided that I prefer outdoor cooking when its 40 degrees rather that 90 degrees.  I've had my first taste of DO cooking in the heat the last few days.  Whew!  Is all I can say.  But I try to never complain about the heat, so I'm loving it.

Did I tell you I'm entering my first ever DO cook off?  My little tiny town is having one as part of Genola Days on the 26th.  I haven't decided on a main dish yet, but I'm doing Tomato Upside Down Cornbread and either Rich Truffle Wedges or Lemon Whirligigs with Raspberries for the dessert.  Those will appear on the blog in the next week, so I'll need your help deciding which to do.  And yes, I do plan on winning at least 1 category, and hopefully more!  So watch out all you Genola-ites!  Okay, on to the recipe!

Parmesan Vegetable Gratin
14" dutch oven

Cream Sauce:

4 Tbs. butter
4 Tbs. flour
2 cups whole milk
1 cup grated Parmesan or Asiago cheese
1 1/2 tsp. lemon juice
pinch of nutmeg
dash of hot sauce (I used Frank's)
Kosher salt and pepper to taste

Melt the butter and add flour.  I used a 10" oven with as many coals as I could fit under it.  Whisk together and cook 5 minutes stirring constantly.  Add the milk a little at a time, whisking until smooth.  Bring to a boil and reduce heat to a simmer; whisk regularly.  When sauce has thickened, add the cheese, juice, nutmeg, hot sauce, salt and pepper.  Remove from heat and set aside.

For the Vegetables:

2 small carrots
3 tomatoes
2 zucchini squash
2 yellow squash
1 red onion
extra virgin olive oil
salt and pepper

Dice the carrots in about 1/2" pieces.  (I sliced mine.)  Core tomatoes and dice to 1/2" pieces.  Seed and dice the zucchini.  Dice the onion.
Toss all the veggies in a bowl with salt and pepper and a little olive oil.  Place in your DO and roast at 375*  for 10 minutes, or until lightly browned.  I used 1 1/2 rings on top and 1 ring on the bottom or 22 coals on top and 12 coals on the bottom. 
Drain off any liquid and pour the cream sauce over the top.  It should not be smothered, just lightly dressed.  Bake another 10 minutes.  Serve immediately.  Serves 6.

The Finished Product


The Review

My hubby and I loved this!  My kids- not so much.  The sauce was light and didn't overpower the veggies at all.  I'll definitely be making this again with fresh garden veggies.  My kids will just have to learn to like it!  : )  I didn't drain off the liquid before I put the sauce on, and you really need to or its to runny.  The original recipe calls for the veggies to be transferred to a baking dish for the last 10 minutes, but draining the liquid helps skip that step.  We give this recipe a B+.

Sunday, June 6, 2010

Day 156: Two-Tone Fudge Brownies

Man this has been a hectic weekend!  I really hope next week slows down so I can relax a little bit!  I could use a hammock, sunglasses, a soft breeze, a diet coke and a good book right about now.  Ahhhh--that's better--I'm in my happy place!  The only thing we still need is chocolate, and I've got that covered with brownies.

Two-Tone Fudge Brownies
12" dutch oven

1 cup semi-sweet chocolate chips
1/2 cup butter or margarine, softened
1 cup sugar
3 eggs
1 tsp. vanilla extract
1 1/4 cups flour
3/4 cup walnuts (I left these out-food allergies)

Cookie Dough Layer

1/2 cup butter or margarine, softened
1/2 cup packed brown sugar
1/4 cup sugar
3 Tbs. milk
1 tsp. vanilla extract
1 cup flour
1 cup semi-sweet chocolate chips

Melt the chocolate chips and cool slightly--I cheated and used my microwave.  In a mixing bowl, cream the butter and sugar.  Add eggs and vanilla; mix well.  Stir in melted chocolate.  Combine the flour and  baking soda; add to batter.  Stir in walnuts.  Spread into a greased 12" DO.  Bake at 350* for 16-22 minutes (mine took closer to 30 minutes) or until a toothpick comes out clean.  Use 1 1/2 rings on top and 1 ring on the bottom or 14 coals on top and 10 on the bottom.  Cool.

For the cookie dough layer, in a mixing bowl, cream butter and sugars.  Beat in milk and vanilla.  Gradually add the flour.  Stir in chocolate chips.  Drop by tablespoonfuls over cooled brownies; carefully spread over the top.  Cut and serve.  Store in the refrigerator.  Serves 10-12.

The Finished Product


The Review

These are really good.  The topping isn't exactly like cookie dough, but I certainly won't shake a stick at it.  It is better if you chill the brownies for a little while before you eat them.  It gives the topping a chance to harden.  These didn't last long at all.  I kept seeing kids licking their fingers, and we all know what that means....the brownies are gone!  We will be making these again!  Grade B+

Saturday, June 5, 2010

Day 155: Potato Bundles

I have to say thanks to everyone for being so patient.  My next door neighbor died a few days ago, and I was privileged to help with the funeral and the luncheon afterward.  There will be a little less humor in the world with Merlin gone.  I wish his family the best.

We had these potato bundles with BBQ hamburgers, but they would work with just about any entree.  This is a Pioneer Woman recipe.

Potato bundles
12" dutch oven

6 whole Russet Potatoes
1/2 whole Yellow Onion, Diced
1 stick Butter
1/2 cups Heavy Cream
Kosher Salt To Taste
Paprika To Taste
Freshly Ground Black Pepper, To Taste
2 Tablespoons Minced Parsley

Pile potatoes and onions on a square of foil. Add 2 tablespoons butter. Splash on cream. Then sprinkle on salt, paprika, and black pepper. Sprinkle minced parsley over the top.
Wrap bundles tightly and bake at 375 degrees for 45 minutes, or until extremely tender.
Serve bundles right on the dinner plate. Serves 8.

The Finished Product
 
 
The Review
 
These were fabulous!  My kids loved having their own little packet of potatoes.  The butter and cream added such great flavors.  You could do these in the campfire or even on the grill, too.  It is a great outdoor menu  item.  They didn't even dirty up a dutch oven.  Who can ask for more than that?  Grade A.

Friday, June 4, 2010

Day 154: Spanish Rice

I have a million things to do today, so just a quick post!
I love Spanish rice, but I have yet to find a recipe that rivals any restaurant recipe.  Its kind of like my quest for the perfect Alfredo recipe.  They are my unicorns.  : )  But I have to say, it is kind of fun to keep trying new recipes!

Spanish Rice
10" dutch oven

1 cup white rice
1/2 onion, chopped
1 can tomato sauce
1 large can diced tomatoes
1/2 can (4 oz.) green chilies
1-2 cups water
salt and pepper to taste
1 tsp. chili powder
1/2 tsp. cumin

Cook the rice and onion in a little oil until the rice is lightly browned.  I used as many  coals as I could fit under my DO.  Add the tomato sauce, diced tomatoes, chilies and water.  Add remaining ingredients.  Bring to a boil and cover.  Simmer over low heat for 20 minutes or until rice is tender, stirring occasionally.  Remove enough coals that it stays at a steady simmer.  I started with 1 cup of water but it wasn't enough so I had to add more.  Just keep an eye on it when you stir it.  Serves 4.

I went to upload the pic and realized I forgot to take one!  Sorry!

The Review

The fam liked this version pretty well.  This is one of the better Spanish rice recipes I've tried.  I'll probably stick with this one until I find one I like more.  It wasn't too spicy, and I'll add more green chilies next time.  I like how easy it was.  I had it simmering in just a few minutes.  It would go great with any kind of Mexican or Tex-Mex meal.  Grade:  B.

Thursday, June 3, 2010

Day 153: Cinnamon Burst Bread

I got an email yesterday from Doug Thornton.  Doug is the president of the Arkansas Dutch Oven Society and an avid follower of yours truly (I'm blushing).  It seems that the ArkDOS is having a recipe contest on their website.  May was desserts, June is main dish, July is yeast bread and August is quick breads.  Can you guess who gets to pick the winner of the desserts contest?  Yep...ME!!  I'm really honored that he would think of me.  Thanks Doug!!  They have a great website!  It looks like they are a really active group of DO cooks.  If you need some new recipes then check the forums section.  It sounds like more yummy recipes will be coming over the summer.  You can bet I'll be checking back often to see what is posted for their contests!  The site is arkdos.org

In my neck of the woods, we have a gourmet bread store called Great Harvest Bread Co.  They have fabulous breads of every variety you could ever want.  The one I really love is called Cinnamon Burst Bread.  I found this knock off version here.

Cinnamon Burst Bread
10" dutch oven

3 T. yeast
1/2 cup sugar
4 eggs, beaten lightly
3 3/4 cup warm water
4 1/2 tsp. salt
3 T. vegetable oil
2 1/2 cups cinnamon bites (Hershey's makes these.  They are near the chocolate chips in the store)
11-12 cups flour (I made mine with half wheat flour)

Combine in mixing bowl 4 cups flour, yeast, and sugar. Add water, eggs, and oil. Beat well to “cake batter” stage. Stir in salt, cinnamon bites, and 7 more cups flour to make bread-dough consistency. Let mixer knead it to the right texture (add up to 1 more cup flour if needed). Place dough in greased bowl, cover, and let rise for 1 hour. Shape dough into 4 loaves and place each one in a 10" dutch oven. Let rise for another hour or until doubled. Bake at 375 degrees for 20-30 minutes.   Use 1 ring on top and 1 ring on the bottom or 16 coals on top and 7 on the bottom.  Makes 4 loaves.

The Finished Product


I burned the top crust, ARGH!


The bottom cooked perfectly and inside it was soft and beautiful!

What I Learned

I really haven't made many loaves of bread.  Last time I put the equivalent of 2 loaves in a 12" dutch oven it took over an hour to cook.  This time, even though I burned the top, a 10" oven was just the right size for 1 loaf.  I'm going to have to try 2 loaves in a 14" oven and see how that works.  It looks like some experimentation is in my future to figure out how much dough will cook properly in what size dutch oven.

The Review

This is pretty close to Great Harvest's bread.  It was soft and delicious.  I also love the color the cinnamon chips make the dough.  And let me tell you, it is sooo good.  My hubby was skeptical, but he ended up eating almost an entire loaf.  If you can save some until the next day, it makes awesome french toast for breakfast.  I did burn the top (dang it!), but that is easily fixed with less top heat (I've already adjusted the recipe so you should be fine).  We just cut off the top crust and it was yummy.  Grade A.

print friendly

Related Posts with Thumbnails