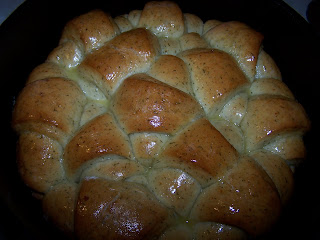
Friday, April 30, 2010

Day 120: Carrot Casserole

Happy snowy Friday!  I know at some point spring has to get here.  Mother Nature is just taking her own sweet time!  So, I decided to bring spring to me in the form of my favorite spring veggie.  Now, its no secret that I love veggies, but of all the spring veggies, carrots and spinach are my faves.  I really didn't have super high hopes for this recipe, but it looked good, so we gave it a try.  We were very pleasantly surprised!

Carrot Casserole
12" dutch oven

8 cup sliced carrots
2 medium onions, thinly sliced
5 Tbs. butter, divided
1 can cream of celery soup
1/2 tsp. salt
1/4 tsp. pepper
1 cup shredded cheddar cheese
1 cup seasoned croutons

In your DO, boil the carrots in water until crisp-tender.  Drain and set aside.  In the same pot, saute the onions in 3 Tbs. butter until tender.  Stir in the soup, salt, pepper and cheese. Add carrots to the onion mixture.  Sprinkle with croutons and drizzle with remaining butter.  Bake at 350*, using 10 coals on the bottom and 14 on top, for 20-25 minutes or until hot and bubbly.  Serves 10-12.

The Finished Product

These were the leftovers that I ate when I got home last night.  They were still yummy!

The Review

I was really surprised at how much we liked these.  All of my kids ate them without complaint.  I cut the recipe in half, and it was plenty for my family, with no leftovers.  I will make these again.  They weren't overly saucy, and they had a really nice flavor.  We gave these a B.

Thursday, April 29, 2010

Day 119: Colton's Taco Filling

I have to play the proud mother for a minute today.  I had to be gone last night, and I got back later than I'd planned.  So I called home to let everyone know that they would have to have leftovers for dinner.  Well, bless my oldest son's heart, he pulled out my dutch ovens, fired up the Camp Chef propane camp stove and cooked tacos for everyone.  After I gave him a big hug, I asked him why he went to all the trouble to do it,  and he said that he didn't want my dutch oven record broken.  Aaaawwww!  What a great kid!  How many 15 year old boys would do that?  I've trained him well, don't you think?  The only thing he forgot to do was take a picture, but I think I can forgive that, since he even cleaned up after himself.  Besides, how appetizing would a picture of taco meat really be?  So here is Colton's Taco Filling.

Colton's Taco Filling
10" dutch oven

1 lb. lean ground beef
1 pkg. taco seasoning
3/4 cup water
1 can refried beans
1 can black beans, drained and rinsed

In your DO, cook the beef until it is no longer pink.  Drain any grease.  Add the taco seasoning, water, refried beans and black beans and mix well.  Cook until heated through.  Serve in taco shells or over chips.  Garnish with cheese, salsa, lettuce, tomatoes and ranch dressing.

The Review

How can I say anything but good about this one?  It does my heart good to see my son growing up and volunteering to take care of and serve others!  I got to have the leftovers, and I had the best taco of my life!
This recipe deserves an A+.

Wednesday, April 28, 2010

Day 118: BLT Braid

I woke up this morning with the worst headache I've ever had. I think I would rather have a baby than a bad headache! But now that I can sit up without barfing, here is today's recipe. I got it from Paula Deen. I really love her. She either deep frys everything or cooks it in bacon grease. What's not to love about that? Her recipe used puff pastry, which I love, but never have on hand. I just used bread dough. You can make your own dough like I did, or use Rhoade's. It will work either way. This would be great for breakfast or brunch. I made it in the middle of the day, and my kids ate it when they got home from school.

BLT Braid
14" dutch oven

12 large eggs, divided
1/2 cup mayonnaise
1 lb. bacon, chopped
1 (6 oz) package fresh baby spinach
3 cloves garlic, minced
1 cup shredded swiss cheese (I used an Italian blend and some mozzarella)
1 cup seeded and chopped tomato
1/4 tsp. salt
2 loaves bread dough

In a large bowl, whisk together 11 eggs and mayonnaise until smooth. Set aside. In a DO (I used my 12" with 18-20 coals), cook bacon until crisp. Using a slotted spoon, remove bacon from pan and drain on paper towels. Reserve 1 Tbs. bacon drippings in DO. Add the spinach and garlic; cook for 1-2 minutes, stirring occasionally, or until spinach is wilted. Add egg mixture and cook until eggs are set, but not dry, stirring occasionally. Remove from heat, and stir in cheese, tomato, salt and reserved bacon. Spoon mixture into a bowl, cover and chill 30 minutes.
On a lightly floured surface, roll out bread dough to a 10 x 15 inch rectangle. Cut strips 1 inch wide and 4 inches long along the long sides of the dough (see pic below). Spoon half of the egg mixture down the center of the dough. Criss cross the strips over the filling alternating sides to form a braid (see pic below). Carefully transfer to a 14" dutch oven. Repeat with the remaining dough and filling. 
In a small bowl, whisk the remaining egg until smooth. Brush egg evenly over both braids (I forgot to do this).  Allow to rise 25-30 minutes. Bake at 350* using 16 coals on top and 14 on the bottom for 25-30 minutes or until golden brown.

The Finished Product


What I Learned

When you make this, or any braid, use parchment paper. Cut it to the size of the DO and then roll the dough out on top of the parchment. After it is filled and shaped, it is easy to transfer to the DO without ruining the shape. I also removed about 1/3 of the bottom coals after 15-18 minutes so I didn't burn the bottom.

The Review

My kids ate this as an afterschool snack. My 15 year old son ate half of one braid. They loved it. I was lucky to get a piece. The filling was moist and delicious and had awesome flavor. They didn't even complain that there was green stuff inside it. This was a total hit with my family. It was also very simple to make. I didn't take a lot of time either. You could do it faster with puff pastry, though. You really should try this recipe. Everyone will think you spent a lot of time and will be impressed by the braid! We gave it an A.

Tuesday, April 27, 2010

Day 117: Mozzarella Stuffed Meatballs

Good morning everyone!  I got the idea for these meatballs from a meatloaf recipe.  I found a mozzarella cheese stuffed meatloaf (which I will probably make soon), and thought it would be good on a smaller scale.  You all know how much I like meatballs-- its strange, I know.  And if you fill them full of cheesy goodness, they are even harder for me to resist. 

Mozzarella Stuffed Meatballs
12" dutch oven

1/4 cup plain bread crumbs
1/2 cup milk
2 cloves minced garlic
1 lb. lean ground beef (be sure to use lean)
2 Tbs. chopped fresh parsley (I used 1 Tbs. dried)
1/2 cup Parmesan cheese, shredded
1 egg
1 tsp. salt
1/2" cubes mozzarella

Soak the bread crumbs in milk.  Add the beef, garlic, parsley, Parmesan, egg and salt.  Mix well.  Take about  2 Tbs. of meat and form into a ball.  Press a cheese cube into the center of each meatball, being careful to completely seal the cheese inside.  Bake at 350* for 25-30 minutes using 14 coals on top and 10 on the bottom.  Serve with marinara sauce.  Serves 6.

The Finished Product

I wanted to take a pic of the cheese inside, but like I said, some of it leaked out!

The Review

These were yummy!  I loved the cheese surprise inside.  But be sure to use lean ground beef.  I mistakenly bought only 80% lean beef and they were a little greasy.  I also didn't seal the meatballs very well, so some of the cheese leaked out.  But as far as flavor, this is one of my favorite meatball recipes.  This recipe will go into our normal meal rotation.  The kids loved it, and so did the hubby!  We gave these a B+.

Monday, April 26, 2010

Day 116: Emerald Rice

One of the hardest recipes for me to find are good side dishes.  I like them easy and delicious.  So many of them are one or the other.  After putting so much effort into a good entree, I want something simple on the side.  This recipe is had me in side dish heaven!  And its nutritious to boot!  I did the entire thing in my DO, so clean up was a snap.

Emerald Rice
10" dutch oven

1 1/4 cups long grain rice (about 3 cups cooked)
2 1/2 cups water
1 (10 oz.) pkg. frozen, chopped spinach, thawed and squeezed dry
1 cup shredded cheddar cheese
1 cup half and half
1/2 cup chopped onion
1 Tbs. butter
1 tsp. salt

In your DO, cook rice in water until tender.  Add remaining ingredients to the rice and mix well.  Bake at 350* for 25 minutes, or until heated through.  Use 12 coals on top and 8 on the bottom.  Serves 8.

The Finished Product


The Review

This was way better than I thought it would be.  My pickiest eaters had seconds.  I'll have to double it next time.  It had such great flavor, I wish there were some leftovers.  It is fairly light too, no heavy sauce, and I love cooking with spinach.  When I was a kid, I thought Popeye was crazy.  Who knew he was actually a genius?  This will go into my tried and true file.  Grade A-.

Sunday, April 25, 2010

Day 115: S'More Cookie Bars

I decided to make treats yesterday since my boys are still at grandma's house.  We all actually got to have some.  Its amazing how long treats last when the 2 teenage boys are gone!  I got this recipe off the back of  a box of Imperial Margarine. 

S'More Cookie Bars
12" dutch oven

3/4 cup margarine, softened
3 cups graham cracker crumbs
1 cup semi-sweet chocolate chips
1 cup butterscotch chips
1 cup mini marshmallows
1 (14 oz.) can sweetened condensed milk

Combine cracker crumbs and margarine and press into the bottom of a DO.  Evenly sprinkle with chocolate chips, butterscotch chips and marshmallows.  Pour condensed milk over the top.  Bake at 350* for 25 minutes or until bubbly.  Use 14 coals on top and 10 on the bottom.  Cool completely before cutting.  Serves 12-15.
The Finished Product


The Review

These were seriously good.  I couldn't stop eating them!  They were also super simple.  They would be good after school snacks for my kids.  You could also use peanut butter chips instead of butterscotch if you wanted to.  I will definately be making these again!  The kids gave these an A.

Saturday, April 24, 2010

Day 114: Super Sloppy Joes

What a beautiful Saturday.  After 3 straight days of rain, its nice to see the sun.  I never thought about the weather this much before I started cooking outside.  If it rained, it rained.  No big deal.  Now I plan my cooking around the weather.  Too funny! 
Last night was a busy night.  I knew I had to be gone, and my hubby had to work, so I cooked dinner in the afternoon and let the kids heat it up later.  Unfortunately, I forgot to take a picture of it.  So, you'll have to take my word for how good this one is.

Super Sloppy Joes
12" dutch oven

2 lbs. ground beef
1/2 cup chopped onion
2 celery ribs, chopped
1/4 cup chopped green pepper
1 2/3 cups canned crushed tomatoes
1/4 cup ketchup
2 Tbs. brown sugar
1 Tbs. vinegar
1 Tbs. Worcestershire sauce
1 Tbs. steak sauce
1/2 tsp. garlic salt
1/4 tsp. ground mustard
1/4 tsp. paprika
8-10 hamburger buns

In your DO, over about 18-20 coals, cook the beef, onion, celery and green pepper until the meat is no longer pink and the vegetables are tender; drain if necessary.  Add the next 9 ingredients; mix well.  Simmer, uncovered, for 35-40 minutes, stirring occasionally.  I removed a few coals so that it was at a slow boil.  Serves 8-10

The Review

This is my favorite sloppy joe recipe.  I like that it doesn't use tomato soup or sauce, and isn't full of BBQ sauce.  It tastes like it has fresh ingredients.  Its just the right mix of sweet and tangy.  This would be an easy camping meal.  It does have to simmer a while, so I just let it cook until the coals are about finished.  Sometimes we will top it with some shredded cheese, and my weird kids like to add a few potato chips on top, too.  This gets a B.

Friday, April 23, 2010

Day 113: Garlic Alfredo Chicken Pizza

It's finally Friday!  Yippee!!  This week end I only have 5 children at home, since the boys are at grandma's house.  This is gonna be a piece of cake.  I'm looking forward to a nice relaxing week end with absolutely nothing that I HAVE to do.
I've also been looking forward to trying this pizza recipe.  I love Papa Murphy's Garlic Chicken Pizza, but I am way to cheap to buy is as often as I want it.  Besides, that would really throw off my DO cooking.  The dough recipe is from Emeril on the Food Network and the sauce comes from a site called Tasty Sensations.  All the comments swear that the crust tastes just like Papa Murphy's, and its pretty close.  I cooked this on the lid of my dutch oven, just like the cookies that I made a few days ago.  It worked great!

Garlic Alfredo Chicken Pizza
12" dutch oven

Dough:
1 pkg. active dry yeast
2 tsp. sugar
1 cup warm water
1/4 cup vegetable shortening
3-4 cups flour
1 tsp. salt
In a mixing bowl, whisk the yeast, sugar, water and lard together to make a paste.  Add the flour and salt to the mix and blend until a soft dough forms.  Place the dough in a greased bowl, cover and let rise until doubled in size, about an hour.  Turn the dough onto a floured surface and divide dough in half.  roll the dough into balls, cover, and let the dough rest 15-20 minutes.  Makes 2 (12 inch) pizzas.

Garlic Alfredo Sauce:
2 Tbs. butter
2 Tbs. flour
1 cup half and half
1/4 tsp. salt
1/4 tsp. garlic powder
Melt the butter in a small DO (8 inch).  Stir in flour and garlic powder.  Slowly add cream.  Stir until thickened and bubbly.  Add salt and mix well.

Pizza toppings:
2 cups mozzarella cheese, shredded
1 cup parmesan cheese, shredded
1 cup chicken, cooked and shredded
2 green onions, chopped
1 tomato, seeded and chopped

Prepare pizza dough as directed.  Dust the lid of a 12" dutch oven with corn meal.  Place dough on lid.  Top each pizza with 1/2 cup of sauce.  Sprinkle with cheese, chicken, green onions, and tomatoes.  Bake at 500* for 8-10 minutes.  Use 24 coals on top and 13 on the bottom.  Be sure to preheat the bottom of the dutch oven.  Makes 2 12" pizzas.

The Finished Product


The Review

This was really good.  In fact, I loved it!  I think it needed just a bit more garlic, but other than that, it was great.  Next time, I'll mix a tablespoon or 2 of olive oil with some fresh minced garlic and lightly spread it over the crust before I put the toppings on.  I think that will add just the right amount.  Even my kids like this pizza, and that is saying something.  We all gave this an A-.

Thursday, April 22, 2010

Day 112: Dill Onion Bread

Sorry for the late post today.  I had to take my boys to the airport to spend the weekend at grandma's house.  So after leaving early and enduring over 3 hours of flight delays, they are finally on their way. 
Today's recipe is another from the 2010 World Championship Cook offs.  I am really excited to bake breads.  They aren't as hard as I thought they would be.  I made these for dinner last night.  They were really quick because you don't have to proof the dough.  They were done in a flash.

Dill Onion Bread
10" dutch oven

1 pkg. active dry yeast
1/4 cup warm water
1 cup 4% cottage cheese
1 egg
2 Tbs. sugar
2 Tbs. dried minced onion
3 Tbs. butter, softened and divided
2 tsp. dill weed
1 tsp. salt
2 1/4-2 1/2 cups flour

Dissolve yeast in warm water in a bowl.  In another bowl, mix cottage cheese, egg, sugar, onion 1 Tbs. butter, dill weed, salt and 1 cup flour.  Add to the yeast mixture.  Beat until well combined, stir in enough remaining flour to form a stiff ball.  Turn onto a floured surface, knead until smooth and elastic, about 6-8 minutes.
Place in a greased bowl.  Cover and let rise until doubled.  Punch dough down, turn onto a floured surface and roll into a circle.  Cut dough into triangles (like you would cut up a pizza).  Brush melted butter on each triangle and roll into crossants.
Place rolls into a 10" DO and brush the tops with butter.  Bake at 375* using 16 coals on top and 7 on the bottom for 35-40 minutes or until the bread reaches an internal temperature of 200*.  Serves 10-12.

The Finished Product


The Review

These were really good.  They had a strong dill flavor, but it wasn't at all overpowering.  They came together quickly, which is a plus!  I also liked how they looked in the pan after they were baked.  I will make these again.  Grade B.

Wednesday, April 21, 2010

Day 111: Lemon Poppy Seed Sugar Cookies

Over the next little while, I hope to have my site become a little more interesting.  I am learning a lot about adding pictures and such to the blog.  But since, quite frankly, I suck at it, it may take a little while.  So don't be afraid if things look different from time to time.  I'm also trying out blogger's new editing program, so please be patient.  : )

On to today's recipe.  I watched some DO demos at the world championships and I wanted to try some of the techniques that I learned.  I also wanted to do something that most people would never think of doing in a DO...cookies!  Yep, cookies.  I figured I could bake them like you would anything else, but that they would be hard to get out of the pot in one piece.  So I flipped the pot upside down and cooked them on the lid.  I won't say it was a success, but it wasn't a failure either.  We will call these a work in progress; a learning experience.

There was one major drawback to baking cookies on the average DO lid.  When the lid is turned upside down, its concave.  If you are using a cookie recipe that spreads, guess what direction they are going to go?  You guessed it, with gravity, right to the center of the lid.  Now that isn't a bad thing, it just effects the appearance of the final product. 
There are 2 ways to fix the problem.  First, use a DO with a flat, deep set lid.  Camp Chef makes a great one that has little legs on the lid just so you can turn it upside down to cook on it.  I have one, but it is only a 10", so it won't hold very many cookies.  Second, you can use a larger lid.  I used a 12" because I only had enough coals left to get a 12" up to temperature.  The larger the lid, the more gradual the slope, so the smallest I would use is a 14", but a 16" would be better.  I guess you could cook them with the oven right side up, but where's the challenge in that?  On to the recipe and the extra pics to help you see what I did!

Lemon Poppy Seed Sugar Cookies
dutch oven lid

2 cups flour
1 tsp. baking powder
1/4 tsp. salt
1/4 tsp. baking powder
1 Tbs. poppy seeds
1/2 cup butter, softened
1/2 cup sugar
1/2 cup brown sugar
1 large egg
1/4 cup buttermilk
1/2 tsp. vanilla
zest of one lemon

In a medium bowl, combine the flour, baking powder, salt, baking soda and poppy seeds; set aside.
In a large bowl, cream the butter and sugars until light and fluffy.  Add the egg, vanilla and lemon zest and mix well.  Add the dry ingredients and buttermilk.  Mix well.
Drop the dough by tablespoonfuls onto a greased DO.  Bake 10-12 minutes, until the edges are set but not browned.  They should be puffy and light in color when they are done.  Cool on a wire rack.  Makes 2 1/2 dozen.


On the left is my lid supported by 2 bricks with coals underneath.  On the right is the cookies ready to bake.  I put them too close together!

During baking.

The Finished Product


What I Learned

This may not have been the best way to bake cookies, but it worked.  It probably would have been much easier to bake them with the oven right side up.  I'm going to try this method again with different cookie recipes to see if I can make it work, and I am going to do pizza this way too.  I watched Dave Herzog bake a perfectly cooked pizza in an upside down dutch oven.  I'm still surprised by how versitale dutch ovens really are!
The Review

As a general rule, I try to reserve sugar cookies for Christmas and Valentine's Day.  I prefer hearty cookie with lots of chocolate, but since someone (read me) ate all the chocolate chips over the last few days, I did these cookies.  They were pretty good.  Not my favorite, but that didn't stop me from eating 6 of them.  They were easy to throw together and the light lemon flavor was a switch from normal sugar cookies.  I'll give these a B, they were good, I just prefer chocolate!

Tuesday, April 20, 2010

Day 110: Chicken Lo Mein

Today's will be a quick post. I'm on my way outside to work in my garden and take advantage of the 80* weather since it will be snowing tomorrow. You gotta love spring in Utah!

Today's recipe comes from a site called Stephanie's kitchen. I found this site just recently, and there are some pretty good recipes there. I had to modify this one just a little bit. The first time I made it, it was so salty that we could hardly eat it. You can find the original recipe at the link.

Chicken Lo Mein
10" dutch oven

2 large boneless skinless chicken breasts, cubed
1 Tbs. olive oil
1/2 lb. spaghetti noodles, cooked and drained
1 bag frozen stir fry vegetables
1 cup low sodium chicken broth
1/2 cup low sodium soy sauce
1 Tbs. cornstarch
2 cloves minced garlic

Mix together broth, soy sauce, cornstarch and garlic. In your DO, heat the oil and add the chicken. Cook until almost done and add vegetables. I used about 15 coals for this. Cook until heated through and chicken is no longer pink. Add noodles and sauce and cook until sauce thickens, about5-8 minutes. Cook 2-3 minutes more, stirring frequently. Serves 4-6.

The Finished Product


The Review

The first time I made this it was way to salty, but we still liked the sauce. The second time, I took out a bouillon cube, and used low sodium broth and soy sauce, and it made a huge difference. We really liked the sauce. Next time I make a stir fry, I'll use this sauce recipe. Its a great week night meal because it comes together so quickly, and it uses ingredients I always have on hand. A lot of people consider this a side dish to something like sweet and sour chicken, but I added more chicken and veggies so it could be a meal on its own. Its probably not something I will make on a regular basis, but for nights we get home late or have a lot to do, it will be a great option. Grade B-.

Monday, April 19, 2010

Day 109: Herb-Rubbed Chicken with Creamy Orzo

I'm not sure where I got this recipe, just that I found it online, and it looked pretty good. So, I apologize to the author of it, whoever you are! If I can find it again, I'll post a link. I've wanted to try this recipe for a while just because it used orzo. I love that little pasta. It is such a nice change from rice (which we eat all the time). I liked that it wasn't fussy,and came together quickly.

Herb-Rubbed Chicken with Creamy Orzo
12" dutch oven

8 oz. orzo pasta, uncooked
2 chicken breasts, butterflied into halves (or 4 small breasts)
Salt and pepper
2 tsp. herb de Provence
2 Tbs. olive oil
1 shallot, finely chopped
2 cloves garlic, minced
1 (14 oz.) can diced tomatoes with juice
2 cups broccoli florets
1/2 cup heavy cream
1/3 cup freshly grated Parmesan cheese

Bring a pot of salted water to a boil. Add the orzo and cook until al dente, about 10 minutes. Drain pasta, reserving 1/2 cup of pasta water.

Season both sides of chicken with salt and pepper. Sprinkle evenly with Herb de Provence. Heat the olive oil in a 12" dutch oven using about 20 coals. Add the chicken breasts to the pan and cook until golden brown. Reduce the heat (I took about 4 coals off) and add the shallot; saute 2-3 minutes. Add the garlic and saute 1 minute more, or until fragrant. Add the diced tomatoes with juice and broccoli florets, scraping the bottom of the pan to remove any browned bits. Bring to a boil, then reduce heat to simmer over medium low. Cover and let cook until the broccoli is crisp tender, about 10-15 minutes. Stir in the cooked orzo, heavy cream and Parmesan cheese. Mix until well blended, and Parmesan cheese has melted. If necessary, add some of the reserved pasta water to smooth out the sauce. Season to taste with salt and pepper. Serve immediately.

The Finished Product


The Review

I was really disappointed by this dish. All the comments about it on the site it came from were about how wonderful it was. I thought it was pretty bland. Even my kids said it didn't have much flavor, and it has to be really obvious for them to notice. I won't make this recipe again as it's written, but it has potential to be delicious. I'm going to experiment with it a bit and see if I can't add some flavor and make it better. What do all of you think? What would you add? I really want to like this one! If I get it worked out, I'll re-post the new version. Grade C-.

Sunday, April 18, 2010

Day 108: Garden Vegetable Pinwheels

I hope everyone is having as beautiful a Sunday morning as we are. Spring is the best time of year in my book. It has made cooking outdoors a pleasure! It also means yeast breads. My kitchen is too cold in the winter to make much in the way of yeast breads. The only time I even go in there in the winter is if I'm cooking, it is just too cold.

So, today's recipe is, once again, from the World Championship Cook Off cook book. If you haven't bought your copy yet, go to the International Dutch Oven Society's web page and order yours. It's worth it even if you only dutch oven a few times a year, since all the recipes can also be made inside. The recipes are, for the most part, really easy! Today's recipe is the bread made by George and Carolyn Dumler during the semi final round of the cook offs.

Garden Vegetable Pinwheels
14" dutch oven
Dough:
5-6 cups flour
2 Tbs. active dry yeast
1/3 cup sugar
2 tsp. salt
2 cups scalded milk (120*)
1 egg, beaten
1/3 cup butter, melted
Filling:
2 eggs
4 oz. cream cheese, softened
1 cup shredded Italian blend cheese
3 cups broccoli florets
1/2 lb. fresh mushrooms, cut into quarters
3/4 cup grape tomatoes, cut in half
4 green onions, sliced
Topping:
1 stick butter, softened
1/2-1 tsp. garlic garni

In a mixing bowl, combine 2 cups flour, yeast, sugar and salt and blend well. Mix in warm milk, egg and melted butter and mix thoroughly. Mix in remaining flour 1 cup at a time until dough pulls away from sides of the bowl. Turn dough out onto a floured surface and knead for 5 minutes until dough becomes elastic and sticky. Roll dough generously in flour, then cover and place in a warm area to rise until doubled, about 30 minutes.

While the dough is rising, mix eggs, cream cheese and 1/2 cup shredded cheese until well blended; stir in vegetables

Punch the dough down, then roll into a rectangular shape about 9 inches by 13 inches. Spoon cheese mixture evenly over dough; sprinkle remaining shredded cheese over the top. Roll dough lengthwise jelly roll style and cut into 1 inch rolls.

Place rolls in a 14 inch DO that has been lightly greased with vegetable shortening. Cover and let raise for about 20 minutes. Bake for 20-30 minutes or until golden, using 10 coals on the bottom and 16 on top. Brush with garlic butter while hot. Serves 10.

The finished Product


What I Learned

This is something I already knew, but a lot of people don't. When you're cutting something like cinnamon rolls or these pinwheels, there is an easy way to do it. I just use dental floss or clean fishing line. Take about a 10 inch length, slip it under the roll of dough and then cross it over the top of the dough and pull until it cuts completely through. It cuts perfect rolls without squishing them.

The Review

These were really good and really easy. I will be making these again. I used straight Parmesan cheese instead of the Italian blend. But when you make these, use the blend of cheeses. Mine didn't have as much flavor as they should have, and I know some of the problem was using just Parmesan. I didn't know what garlic garni was, so I didn't use it. I was just going to use minced, fresh garlic in the butter for the topping. Then I totally forgot to put the topping on! The garlic would have made them great. We loved them even with all the mistakes I made. I can only imagine how much better they would taste if I had actually followed the directions properly. Grade B+.

Saturday, April 17, 2010

Day 107: Parmesan Bread

Happy Saturday! Saturdays should be a holiday. It feels good not to have to do a million things. I mean, I do have a million things to do today, but most of them I WANT to do. Like planting a new raspberry patch. I have 30 new purple raspberry plants that will nicely compliment the red and gold raspberries I already have. YUM! This summer I will have to do a week of DO recipes using raspberries. But, enough of that....

Today's recipe is a yeast bread. I got it from the World Championship Cook off recipe book. Bill and Toni Thayn made this as their bread in the semi final round. I don't know how well it scored, but it was sure tasty. It is also beautiful, and surprisingly easy to shape.

Parmesan Bread
12" dutch oven
2 1/2-3 cups flour
1 1/2 Tbs. sugar
1 Tsp. salt
1 pkg. yeast
1 cup water
2 Tbs. oil
1/4 cup Parmesan cheese, shredded
1 tsp. oil
1 small clove finely chopped garlic

Combine 1 cup flour, sugar, salt and yeast in a large bowl. Blend well. Heat water and oil until very warm (120*-130*). Add warm liquid to flour mixture. Stir in additional 1 1/4-1 1/2 cups flour until mixture forms a ball. Knead additional 1/4-1/2 cup flour until dough is smooth and elastic, about 10-12 minutes. Place in a greased bowl and let rise until doubled, about 1 hour.

Sprinkle 2 Tbs. of Parmesan cheese over a flat surface. Roll bread dough into a 24" rope and roll in cheese. Place rope in your DO and form into a circle. Pinch ends to seal. Make cuts in the dough at about 1 1/2 inch intervals from the outer edge of the circle, cutting 2/3 of the way through. Lift and turn every other section of the dough toward the center of the circle. Cover and let rise until double, about 1 hour. Mix oil and garlic. Brush over the dough. Sprinkle with remaining 2 Tbs. Parmesan cheese. Preheat DO lid until hot, and bake 375* for 25 minutes or until golden. Serves 6-8.

The Finished Product

What I Learned

This is actually something I already knew, but forgot to do. Whenever I make any kinds of yeast breads, whether in a DO or indoors, I always grease my pan with shortening. It doesn't absorb into the bread as quickly as cooking oil, so the bread is easier to get out of the pan in one piece.

The Review

Man, this was easy to make. The whole thing went off without a hitch! The dough rose perfectly, and the bread had a nice soft, smooth texture. It is these kinds of recipes that really boost one's confidence. It looks complicated to shape, and it's pretty impressive. As I think back to how intimidated I was to make DO yeast breads, I want to laugh. Not that I don't still have a lot of learning to do, but I'm not nervous to try them. Yeast breads have become one of those fun challenges. So give this recipe a try, it is simple, delicious, and beautiful. Grade A.

Friday, April 16, 2010

Day 106: Creamy Ranch Chicken

How many favorite recipes am I allowed? I have to say, with the exception of a few, I've been pretty lucky with the foods I've made. As we get closer to the end of the year, I'm sure I'll have more flops, but so far, most have been really good. It does help that I'm generally not a picky eater, except for a few foods. My children on the other hand.... Sometimes I wonder how they stay alive when they only eat the required one bite of everything. I am happy to report that this chicken got rave reviews, even from my pickiest eaters.

Creamy Ranch Chicken
12" dutch oven

6 slices of bacon, cut up
4 boneless skinless chicken breasts, cut into bite sized pieces
2 Tbs. flour
2 Tbs. dry ranch salad dressing mix
1 1/4 cups milk
3 cups dried medium noodles
1 Tbs. finely shredded Parmesan cheese

Cook the pasta according to package directions. I did this in a 10" DO. In your 12" oven, cook the bacon until crisp. I used 20 coals for this. Remove bacon with a slotted spoon and drain on paper towels. Drain all but 2 Tbs. of grease. In the same DO, cook the chicken in bacon drippings until no longer pink. Sprinkle flour and salad dressing mix over the chicken; stir well to coat all the chicken. Stir in milk. Cook and stir until thickened and bubbly. Cook and stir 1 minute more. Stir in bacon. Serve over egg noodles and sprinkle with Parmesan cheese. Serves 4.

The Finished Product


The Review

I loved this! My kids loved this! There was not one scrap of chicken left after dinner. And talk about easy. It is the perfect week night meal. It comes together quickly, and it tasted great! I, personally, could have left out the chicken and just had the bacon. But if you have been reading my blog for any amount of time, you already knew that. Seriously though, it does need more bacon. You could probably put in a 12 oz. package and it wouldn't be too much. This recipe should be on every one's "must try" list. Grade A.

Thursday, April 15, 2010

Day 105: Gooey Apple Cake

Just a quick post, I'm running behind-again. The kids missed the bus, so now I have to drive them to school.

Gooey Apple Cake
10" dutch oven

8 Tbs. butter, divided
1 1/2 cups sugar, divided
1 egg
1 cup flour
1 tsp. baking soda
1/2 tsp. cinnamon
1/4 tsp. salt
2 lg. tart apples, peeled and chopped (I used Granny Smith)
2 tsp. cornstarch
1/4 cup evaporated milk
1 tsp. lemon juice
1 tsp. vanilla extract

Cream 5 Tbs. butter and 1 cup sugar. Add the egg and beat well. Stir in the flour, soda, cinnamon, salt and apples. Batter will be stiff. Spoon into your oiled DO and smooth the top. Bake at 350* for about 35 minutes, using 8 coals on the bottom and 12 on top.

Combine the remaining 3 Tbs. butter, 1/2 cup sugar, cornstarch and evaporated milk in an 8" DO (a 10" would work too). Bring to a boil over medium heat. I used 8-10 coals. Boil 2 minutes, stirring constantly. Remove from heat and stir in lemon juice and vanilla. Pour over hot cake; serve warm. Serves 8-10.

The Finished Product


The Review

This was good. It wasn't cake with apples in it, it was apples with cake in it. Next time, I will add some ground cloves or maybe apple pie spice to the batter, just because I really like their flavor. I royally screwed up the frosting. I forgot to put the sugar in so it was really bitter and yucky. It improved greatly when I sprinkled sugar over the top. Some dulce de leche or caramel ice cream topping poured over the hot cake would be good as an icing and it would be easier. I will make this again. I liked all the chunks of apple and the cake was really moist. Grade: B.

Wednesday, April 14, 2010

Day 104: Guiltless Baked Zucchini

I probably should have saved this recipe for July or August when my garden in overflowing with zucchini, but I found it on sale and I wanted a preview of summer. Zucchini is one of my (many)favorite veggies. I can't think of any off the top of my head that I don't like, but zucchini is on the short list of faves. You can put it in just about anything, but it has such great flavor that I like to eat is on its own. Normally this recipe is deep fried and full of calories. Not that I have anything against calories, they taste GREAT, but I could probably do without some once in a while. So after all the yummy dutch oven food we have enjoyed so far this year, here is a healthy choice!

Guiltless Baked Zucchini
14" dutch oven

2-3 medium zucchini, cut into spears
2 eggs
1-2 Tbs. milk
1 cup Italian bread crumbs
1/2 cup Parmesan Cheese
Salt and Pepper to taste
Butter or cooking spray
Spray the bottom of your DO with cooking spray. (I don't like the propellants in cooking spray, so I just oiled my oven.) Combine the eggs and milk in a bowl. In another bowl, combine the bread crumbs, Parmesan cheese and salt and pepper. Dip each zucchini piece in the egg mixture, then dip into bread crumbs until evenly coated. Place zucchini in you DO and spray each piece with cooking spray. Bake at 425* for 10-15 minutes or until golden brown. Serve hot with ranch dressing or marinara sauce. Serves 4-6.

The Finished Product

The Review

These were awesome! If I hadn't made them myself, I would never have guessed they were baked! They were crispy on the outside and soft on the inside--just like some people I know! :) I will, for sure, be making these again. Even my zucchini hating 7 year old loved them. Of course the ranch dressing could have had something to do with that. But whatever it takes for them to eat their veggies! Don't wait for summer to make these, they were great! Grade: A.

Tuesday, April 13, 2010

Day 103: Chicken Enchiladas

Good rainy morning! It is dark and dreary outside, but I'm not complaining because I was out in my garden yesterday morning and saw new little raspberry plants coming up. Anything that helps those little babies grow is okay with me! I can't wait to eat them by the handful! I am loving all the signs of spring! It is my favorite time of year by far.

Speaking of favorites, last night I made my family's favorite dinner. If I want to brown nose my kids, I do it with chicken enchiladas. I got this recipe from a friend who got it from a little old lady who immigrated from Mexico many years ago. There is no canned sauce in this recipe. It is all made from scratch, and is easier than you would think.

Chicken Enchiladas
12" dutch oven
15-20 corn tortillas
2 cups cooked, cubed chicken
1 lg. onion, chopped
3-4 cups shredded cheddar or Monterrey Jack cheese
1 can sliced olives
For the sauce:
1 cup butter
1 1/2 cups flour
3/4 cup chili powder (Don't be scared, it isn't spicy!)
1 tsp. cumin
1 tsp. cayenne or to taste
4 quarts chicken stock or broth
For the sauce, melt the butter in a large stock pot. Add the flour and cook slowly for about 5 minutes. Gradually add the stock. Add the seasonings. Bring to a boil and cook until it starts to thicken up. Reduce heat and simmer for 45 minutes.
Assembly:
Dip each tortilla in the sauce. Place in the DO and add cheese, a few pieces of chicken, onions and 2-3 olive slices. Roll up and place in pan seam side down in a single layer. Repeat for the remaining tortillas. It is a bit messy. When the pan starts to get full, just put the dipped tortilla on top of the rolled up enchiladas to put in the filling ingredients. When the DO is filled, pour some sauce over the top, and top with remaining chicken, onions, olives and cheese. Bake at 350* for 20-25 minutes or until bubbly and the cheese is melted. I used 10 coals on the bottom and 14 on top. Serves 12-14.
**This makes a lot of sauce! It makes enough for about 3- 9 x 13 pans or 12" DOs full. The sauce freezes well, just thaw in the refrigerator and bring to a boil until it is smooth to use it.**
During Assembly


The Finished Product

The Review
This is our favorite meal. I absolutely love the sauce! While its simmering, I sneak spoonfuls of it! It is very easy to make. I make the sauce ahead of time, let it cool and freeze it in 3 freezer bags so I always have it ready. I've used it in soups and other recipes calling for enchilada sauce. My kids love this too! Don't worry about all the chili powder, it doesn't make it spicy, it just adds great flavor and beautiful color. If you like super spicy, kick up the cayenne pepper. The tortillas are so tender that they never come out whole. We just scoop out a big spoonful and eat it with chips. These get an A!

Monday, April 12, 2010

Day 102: Tamale Pie

Good morning everyone! The sky is sunny and blue, its 60 degrees and snow is in the forecast for today. Must be spring in Utah. Even with the snow, I won't complain about the 60 and sunny part. I will, however, do my DO cooking this morning to take advantage of the warmth.

Unfortunately, Old Mother Hubbard has once again taken up residence at my house. I got everything ready to make one of my favorite meals, chicken enchiladas. I even spent and hour outside cooking the sauce, only to find that I had no chicken anywhere in the house. Argh! Thankfully, I had been to the Spring Convention and had a delicious recipe waiting to be made, and I even had all the ingredients! Cindy Boyer made this on Saturday at the convention. So thanks to her, for saving dinner last night!

Tamale Pie
12" dutch oven
2 tbs. olive oil
2 cups chopped onion
2 cups chopped green peppers
2 lbs. ground beef
2 cloves minced garlic
2 Tbs. sugar
2 tsp. salt
dash of pepper
4 (8 oz.) cans tomato sauce
2 cans corn, drained
2 cans chopped olives
chili powder to taste (2-6 tsp.)
3-4 cups Colby jack cheese
Corn Meal Topper
1 1/2 cups cornmeal
4 cups cold water
1 tsp. salt
2 Tbs. butter
Saute onion and peppers in olive oil. Add the meat and brown. Add the next 8 ingredients. Simmer 20-25 minutes or until thick. Use 20-22 coals. For the cornmeal topper, stir cornmeal, butter and salt into cold water in a 10" DO. Bring to a boil over about 15 coals, stirring constantly. It will look like thick mush. Sprinkle the meat with cheese and spoon the cornmeal topper over the meat mixture. Bake at 375* using 18 coals on top and 9 on the bottom, for about 30 minutes or until the filling is slightly browned. Serves 10-12.
The Finished Product

The Review

This was really good. My hubby is not a fan of casseroles in any form, and he ate 3 servings. That is saying something! All but my 2 pickiest eaters loved it. I really liked that it wasn't a cornbread topping, but more of a cornmeal mush. This would be really simple to make when we go camping. I will warn you, it makes a ton! If you aren't feeding an army, I would cut it in half. When I put mine together, it seemed too thick so I added a little more tomato sauce. Don't do that! Mine ended up runnier than I would have liked. I did substitute 2 cans of the tomato sauce with 2 cans of El Pato jalapeno salsa. It is this great little green can of spicy tomato sauce. You can find it in the Hispanic section of most grocery stores. It didn't make it spicy at all, it just added a great flavor. We all gave this recipe a B+.

Sunday, April 11, 2010

Day 101: Bacon Cheddar Scones

I got to spend the day at the IDOS Spring Convention in Farmington. It was a lot of fun! After I finally found the convention center (I'm seriously directionally challenged), I got to set up and cook between Jack Wallace who is the Director of Education for IDOS and Omar Alvarez who competed in the World Championship Cook-offs this year. Talk about good company. I also finally got to meet Mark from Mark's Black Pot. He was there cooking with his son. There was a lot of good food to be had. It is amazing how you can eat yourself sick when you are only having a little sample cup of everything (I had 2 little cups of the chocolate cheesecake, but don't tell anyone).

The most impressive part of the day was the youth cook off. Those kids were amazing. Honestly, any adult dutch oven cook would love to produce the kinds of dishes those kids made. It made me feel like a total amateur. I aspire to cook like those kids. Their presentation was beautiful, and the food delicious.

Today, I cooked the Upside down Tomato Cornbread, a Broccoli Ham Ring (both are on my blog already), and some Bacon Cheddar Scones. The corn bread turned out beautifully! I used a sheet of parchment paper on the bottom so it didn't stick to the pan. I love that it came out of the pan perfectly. It got some "ooohs and ahaaas" and a lot of "mmmmms" and "that's goods". It was a real hit! The Broccoli Ham Ring also went over well. I had a line of people waiting for a taste when it came off the coals. By the time the scones were ready, the crowd had thinned a bit, so I got to bring a few of them home for the kiddos to try. And speaking of the scones....

Bacon and Cheddar Scones10" dutch oven

3 cups flour
1 Tbs. baking powder
1 tsp. salt
1 tsp. black pepper
8 Tbs. cold butter, cut into small pieces
1 1/2 cups shredded cheddar cheese
4 green onions, thinly sliced
10 slices bacon, cook and crumbled into pieces
1 cup buttermilk (plus up to 1/2 cup extra, if needed)

In a bowl, combine the flour, baking powder, salt and black pepper, mix well. Add the cubes of butter and use a pastry blender or 2 knives to cut the butter into the dry ingredients. Add in the grated cheese and mix.
Mix in the green onions, bacon and 1 cup of buttermilk into the flour mixture. Stir by hand just until all the ingredients are incorporated. If the dough is too dry to come together, mix in the remaining buttermilk a tablespoon at a time until the dough can be formed into a ball. Press the dough into your DO and slice into 8-10 wedges. Bake at 400 degrees for 18-20 minutes. I used 17 coals on top and 8 on the bottom.

The Finished Product


The Review

These were pretty good. I think they were a little salty. I personally think you could leave out the 1 tsp. of salt because the bacon takes care of that nicely. I would also cut back on the onion a bit. I used 4 green onions, tops and all, and it may have been just a bit too much. The seemed to go over well at the convention, but everyone liked the cornbread and broccoli ring better. My kids ate the leftovers when I got home and they liked them. I like that they are a change from the regular breads I serve with meals. It is nice to mix things up a bit. I will be making these again with the changes I noted above. I'll give them a B.

Saturday, April 10, 2010

Day 100: Spinach and Cheese Stuffed Meatloaf

Day 100! Wow! I think I'll give myself a pat on the back for sticking with this little project. 100 is always a celebrated day. The president's first 100 days in office, the 100th day of school, the 100th episode of a TV show. It should come with some kind of fanfare, but we will have to settle for one of my favorite recipes so far. I found this one in a church cookbook. I've said it before and I'll say it again, that is where the best recipes are found. Now, I don't know about you, but I am a raging carnivore! I love meat!!! Give me a thick grilled steak, chicken, meatballs, salmon and yes, meatloaf. The only meat I don't eat is pork. We have raised too many pigs and eaten too much pork. I have cooked it every way known to man, and I ain't cooking it no more! Maybe in a few years. I do make an exception for ham and sometimes pork tenderloin. But I'm getting off topic. Meatloaf, large loaves of meat...I love them! I do have to warn you, the picture of this is TERRIBLE. I think some of the steam fogged up my camera lens. So you will just have to take my word for how good this is.

Spinach and Cheese Stuffed Meatloaf
12" dutch oven

1 1/2 lbs. lean ground beef
3/4 cup bread crumbs
2 eggs
1 tsp. salt
1/2 tsp. onion powder
1 (10 oz.) pkg. frozen chopped spinach, thawed and drained
1/8 tsp. pepper
3/4 cup shredded mozzarella cheese
3 Tbs. grated Parmesan
1 tsp. Italian seasoning
1/4 tsp. garlic powder
3 Tbs. ketchup
Combine the ground beef, bread crumbs, eggs, salt, onion powder and pepper; mix well. On a length of waxed paper or aluminum foil, pat the meat mixture into a 10 x 12 rectangle. Mix together the spinach, 1/2 cup cheese, Parmesan cheese, Italian seasoning and garlic powder. Spread over the beef mixture to within 3/4" of the edges. Starting at the short end, roll the meat up as you would a jelly roll. Seal meat over the filling on the ends. Place roll, seam side down, in your DO. Bake at 350* for 1 hour. Spread ketchup over top of meatloaf and bake 15 minutes more. Remove from heat and sprinkle with remaining cheese. Cover and let the meatloaf stand for 10 minutes. Use 14 coals on top and 10 on the bottom. I also completely replaced the coals about 45 minutes into cooking. Serves 6-8.
The Finished Product
The Review
This is my new favorite meatloaf. I loved this. It is perfectly spiced and totally delicious. One of the best things about this meatloaf is that it is really pretty, but doesn't take any more time to make than a normal one. Even my crazy meatloaf hating kids ate this. That equals a major triumph. The only problem I had was that the top of the loaf split during baking. I'm not sure how to fix that so it doesn't happen again. I may not have pressed it together well enough when I pressed it out. Never the less, I will be making this often. Grade: A.

Thursday, April 8, 2010

Day 99: BBQ Chicken and Ranch Spaghetti

Good Friday everyone! Finally, we are at the end of the week. There are a few things I've neglected to tell you about. First, is that I am excited to be involved with the IDOS Spring Convention in Farmington, Utah on Saturday. I will be cooking in the Taste of Dutch. I am cooking the Tomato Upside Down Cornbread, and maybe one or two other dishes. Honestly, I have never been to one of these kind of things. I have no idea what to expect, except that I will be hob nobbing (did I spell that right?) with some great people. Any tips or advice anyone?
Second, a reader named Carolyn has been making some youtube videos of the recipes she has tried. You can watch them here and here. Thanks to her for taking the time to not only try the recipes, but then to go to the work of making and posting videos!
Finally, I am going to start using my World Championship Cook Off cookbook. So a couple of times a month, at least, I will be trying some of the award winning recipes. I don't even pretend to be in the same league as the cook off participants, but it will help my DO skills to try their recipes. If you still haven't got a copy of the cookbook, you can order one here. The recipes look and taste amazing! Since I'm working on yeast breads, I'll start with some of the bread recipes, so stay tuned!
My Thursday's are terribly busy, so we always have quick meals. This one is ridiculously easy. the combination of ingredients is kind of weird, but it was good. It would be a super easy camping meal. I got this recipe at Picky Palate.

BBQ Shredded Chicken and Ranch Spaghetti
10" dutch oven

1 lb. thin spaghetti
4 Tbs. olive oil
1/2 large red onion, peeled and finely chopped
2 Tbs. dry ranch dressing mix
3/4 cup chopped fresh cilantro leaves (I didn't have any of these)
Shredded BBQ chicken (I used cooked shredded chicken mixed with BBQ sauce)
In your dutch oven, cook the noodles according to package directions, drain and set aside. In the same DO, add the olive oil and onions and saute until softened and golden. Add the cooked spaghetti to the onions; mix in dry ranch dressing seasoning and cilantro leaves. Season with a pinch of salt and pepper to taste. Top spaghetti with BBQ chicken.
I tried this several different ways. I tried it with the dry ranch dressing, which was good. I also tried it with bottled ranch dressing. I only used a little bit, because you want it to barely coat the noodles to add just a bit of flavor. You don't want it saucy. I actually liked it better because the pasta stayed more moist. You could also add bottled ranch dressing to your BBQ sauce to make it even easier for camping. For that matter, you could use that Lloyd's BBQ chicken that you can buy in tubs at the store. I also topped ours with some mozzarella cheese.
The Finished Product
The Review
This would be a great camping meal and a great busy night meal. It didn't "wow"me, but even my hubby said it was good, and that's a pretty good recommendation because he is picky. This will be going camping with us this summer. Grade B.

Day 98: Chicken Stroganoff

You know it is a busy day when you finally sit down to dinner at 7:30. My kids were starving! I almost forgot to take a picture of this recipe. I adapted this recipe from one in a Taste of Home magazine. It is a great week night meal because it comes together pretty quickly.

Chicken Stroganoff
12" dutch oven

10 bacon strips
1 lb. boneless skinless chicken breasts, cut in 1/4" strips
1 medium onion, chopped
2 (4 1/2 oz.) jars mushrooms, drained
3 carrots, thinly sliced
1 1/2 cups chicken broth
2 cloves minced garlic
1/2 tsp. salt
1/8 tsp. paprika
pepper to taste
4 tbs. flour
1 cup sour cream
In your DO, cook bacon until crisp. Drain, reserving 2 Tbs. drippings, set bacon aside. In the drippings, cook chicken, onion, mushrooms and carrots until the chicken is no longer pink. Add the broth, garlic, salt, paprika, pepper and bacon. Cover and simmer 10 minutes. Combine flour and sour cream until smooth; add to the DO. Bring to a boil; cook and stir for 2 minutes, or until thickened. Serve over noodles or rice. Serves 4-6. I used 22 coals for this one.

The Finished Product

The Review

This recipe didn't "wow" me, but it was a good week night meal. Everyone liked it, and there weren't any leftovers, so I would call it a success. The bacon (of course) was the best part. I didn't have enough sour cream so I ended up using some cream of chicken soup as a substitutefor part of the sour cream. My sauce also didn't thicken up very well, so I used some of the roux from my fridge to finish thickening it. I will make this one again. Since I usually have all the ingredients on hand, it may make an appearance on busy nights quite often. We all decided that this recipe gets a B.

Wednesday, April 7, 2010

Day 97: Meatballs with Cream Sauce

Boy, does it feel good to sleep in. Spring break couldn't have come at a better time! I'm usually up at 5 am to start getting kids to the bus on time, so this is a nice change! Have I ever mentioned that I love meatballs? I don't know what it is about bite sized ball of meat with sauce or gravy that is so good. I probably have about a dozen recipes for them. This is one of my favorites. I found it in a Taste of Home magazine years ago.
Meatballs with Cream Sauce
14" dutch oven
1 egg, lightly beaten
1/4 cup milk
2 Tbs. ketchup
1 tsp. Worcestershire sauce
3/4 cup quick oats
1/4 cup finely chopped onion
1/4 cup minced fresh parsley (I used 2 Tbs. dried)
1 tsp. salt
1/4 tsp. pepper
1 1/2 lbs. lean ground beef
1/4 cup flour
Cream Sauce:
2 Tbs. butter
3 1/2 Tbs. flour
1/4 tsp. dried thyme
1/4 tsp. salt
1/8 tsp. pepper
14 oz. chicken broth
2-3 cup milk
2 Tbs. minced fresh parsley
In a bowl, combine all the meatball ingredients except the beef and flour. Add the beef and mix well. Shape into balls. Roll in flour, shaking off excess. Place in your DO and bake at 400* for 10 minutes. Turn meatballs and bake 8-10 minutes more or until no longer pink. I used 24 coals on top and 12 on the bottom.
For the sauce, use an 8" or 10" dutch oven, melt the butter and stir in the flour, thyme, salt and pepper until smooth. Gradually add the broth and milk; bring to a boil. Cook and stir 2 minutes, until slightly thickened.
Drain the meatballs on paper towels; transfer to a serving dish. Top with sauce. Serve over rice or noodles.
The Finished Product

The Review
I loved these! Most meatballs have some sort of BBQ sauce on them, and I loved the light cream sauce. I also love that these are baked and not fried. I have baked all my meatballs for years, it is just so much easier than frying. They were tender and had great flavor. Even my 2 year old at 4 of them. These are always on our winter menus. These get a B+.

Tuesday, April 6, 2010

Day 96: Vegetable Tian

Winter has arrived yet again! I almost had to move my operations indoors because the wind was so bad. I don't know how it can blow from every direction at once. Even my garage wasn't safe. But I made it through.
I am really liking roasted veggies right now. I love the flavor and look of them. They would be even better if they were fresh from my garden, but this time of year we just have to make do with what we have. They are still delicious. I found this recipe on the Internet, unfortunately, I can't remember where, so my apologies to the site owner. If I can find where I got it I'll post it! Please note that the amount of veggies is just a guide. How much you need will depend on the size of your pan and how tightly you place them.
Vegetable Tian
12" dutch oven
Olive oil
2 yellow onions, cut in half and sliced
2 cloves minced garlic
1 lb. medium round potatoes
3/4 lb. sliced zucchini
1 lb. sliced tomatoes (I used romas)
1 tsp. kosher salt
1/2 tsp. fresh ground pepper
1 Tbs. fresh thyme leaves (I used 1 1/2 tsp dried)
2 oz. Parmesan cheese, grated
In your DO over about 20 coals, Saute the onion in 2 Tbs. olive oil until translucent. Add the garlic and cook for another minute. Remove from heat and spread out on the bottom of the pan. Slice the potatoes, zucchini and tomatoes. Layer them alternately in the DO on top of the onions, fitting them tightly, making only one layer. Sprinkle with salt, pepper and thyme leaves. Drizzle with 1 more Tbs. of olive oil. Cover and bake at 375* for 30 minutes, or until the potatoes are tender. Sprinkle with grated cheese and bake 30 minutes more. I used 18 coals on top and 9 on the bottom. I also replenished about 1/2 of the coals after the first 30 minutes. Serve warm. Serves 4-6.
The Finished Product

Isn't that beautiful?
The Review
These were really good. I love the flavor of roasted veggies. My kids weren't overly thrilled, but there wasn't a drop left after dinner, so they didn't hate them. The onions on the bottom got a little to done, next time I won't saute them quite as long. It also needed more salt, but not a lot. I know it would be much better to make in August with fresh veggies than in April. I think I will revisit this recipe over the summer. For now it gets a B.

Monday, April 5, 2010

Day 95: Chunky Chicken Noodle and Vegetable Soup

Wow! We are all trying to get over a major sugar hangover this morning! I ate way to much candy yesterday. I think I'm going to be sick today. All I want to eat is salads or veggies. If I never have candy again it will be too soon. At least for today. Easter was a great day! It is so fun to spend time with my family. We had the whole crew together at grandma's house. It was total chaos with 14 kids running around (half of them were my own). But we had a blast having egg hunts and blowing bubbles for the little ones.
We have had some crappy weather the last few days. Yesterday we woke up to 5" of snow. The only good thing about it is that it makes everyone want to eat soup. And I found an excellent recipe that will go into my tried and true file. I found this at Picky Palate.
Chunky Chicken Noodle and Vegetable Soup
12" dutch oven
3 Tbs. olive oil
1 medium white onion, chopped
5 stalks celery, chopped,
4 large carrots, peeled and sliced
1 cup sweet red peppers, chopped
1 zucchini chopped into 1/2" pieces
1 yellow squash, chopped into 1/2" pieces
1 1/2 cup eggplant, chopped into 1/2" pieces (I left this out)
5 cloves fresh garlic, minced
48 oz. chicken broth
9 oz. noodles
1 Tbs. coarse Dijon mustard
1 tsp. hot sauce
2 large chicken breasts, cooked and shredded
1 cup fresh parsley, finely chopped
pinches of kosher salt, black pepper, garlic salt, and thyme
Place the oil in your DO over about 22 coals. When hot, add the onion, celery, carrots, sweet peppers, zucchini, yellow squash, and eggplant. Cook and stir until tender, about 5-7 minutes. Stir in the fresh garlic; mix in for 30 seconds then stir in the broth. Bring the soup just to a boil and stir in the noodles. Cook 7-10 minutes or until noodles are al dente. Stir in Dijon mustard, hot sauce, chicken, parsley and seasonings to taste. Reduce heat, I took off about 4 coals, and simmer until ready to serve. Serves 8-10.
The Finished Product
The Review
This is my new favorite chicken noodle soup. It is so good. The veggies and broth were so good. I can't say enough about it. Everyone loved it, which is rare around these parts. I can't wait to eat the leftovers for lunch. It was hearty and filling. We had it with cheesy bread, and it was a meal. As my new favorite soup, this gets an A.

Sunday, April 4, 2010

Day 94: Easter Egg Bread

Happy Easter everyone! I hope you are all having a wonderful day. Easter is one of my favorite holidays. I love the spiritual significance of the holiday as well as the fun for the kiddos. I love that it makes me reflect on all the gifts that we receive through the life of Jesus Christ and through our faith in Him. I am also grateful that Easter weekend is also conference weekend. For members of the Church of Jesus Christ of Latter-day Saints, it is when we get to receive spiritual direction from our church leaders. It would be like hearing the Pope speak if you were Catholic. It is a time for family and food, two of my favorite things.
I am really excited to share this recipe. I found it on a site called Simple Bites. I have seen pictures of this bread before, but never had a recipe until now. It is beautiful, and very festive, and surprisingly simple to make. It is my first real dutch oven yeast bread. I was nervous to try it, but the results were worth it.
Easter Egg Bread
12" dutch oven
6-6 1/2 cups of flour
1/2 cup flour
2 pkgs. active dry yeast
1-2 tsp. ground cardamom
1 tsp salt
1 1/2 cup milk
6 Tbs. butter, cubed
3 eggs
For the decorations and glaze:
3-6 hard boiled eggs, dyed
vegetable oil
1 egg
2 Tbs. cold water
In a large mixing bowl, combine 2 cups of flour, sugar, yeast, cardamom, and salt. In a sauce pan over medium heat, warm the milk and butter to 120* to 130*. Check with a thermometer. Add the warm milk to the dry ingredients; beat just until moistened. Add the 3 raw eggs and beat until smooth. Stir in enough of the remaining flour, 1/2 cup at a time, to form a soft dough that pulls away from the sides of the bowl. Turn the dough onto a floured surface and knead until smooth and elastic. It should feel smooth like a baby's bottom, about 10 minutes. Place dough in a greased bowl, turning once to grease the top. Cover and let rise until doubled, about 45 minutes. Punch dough down. Turn onto a floured surface and divide the dough into 3 equal parts. Shape each part into a 24" rope. Place the ropes side by side and braid. It was easiest to start in the middle, braid to the end, and then braid up the other end. Bring the braid ends together to form a ring. Pinch the ends together to seal.
Rub the dyed eggs with oil. Gently separate the braided ropes and tuck the dyed eggs into the openings. Place in your oiled dutch oven. Cover and let rise until doubled, about 20 minutes. Beat the water and egg together and gently brush over the dough with a pastry brush. Bake at 375* for 28-31 minutes or until golden brown. Use 18 coals on top and 9 on the bottom. Carefully remove the bread from your dutch oven. Be sure to preheat the DO lid well.
The Finished Product
What I Learned
This was my first real attempt a yeast breads, and it turned out beautifully! I did mine in a 10" DO and it was too small. The bread rose so high that it hit the lid and the top crust got way to brown. A 12" will work better because the dough can spread out as it rises and won't get so tall, but will still fill the DO. Mine had to cook longer because it was so tall and thick, using a 12" oven should help that as well. Also, don't forget to preheat your lid. Get it nice and hot.
The Review
This was delicious! The bread was soft and had a nice smooth texture. It was also beautiful. I was surprised at how easy it was to shape. It is such a festive bread, and would be fun served with an Easter meal. My family though it was really fun to eat and the eggs tucked into the bread made the little ones really happy! Even with the top crust too brown, we really enjoyed it. Grade A, just for the fact that it is my first successful bread, and it was really good!

print friendly

Related Posts with Thumbnails